Monthly Archives: September 2015

28-9-2015 – What did we do today 26-9-2015 Xb service , XB Brake disc trouble

What did we do today 26-9-2015 Xb service , XB Brake disc trouble

Source: TWIN Motorcycles


28-9-2015 – What did we do today 26-9-2015 Xb service , XB Brake disc trouble

Xb Service, very nice Long with S ( short tail section ) in for some TLC

Xb Service, hot as it comes… so draining the oil

Xb Service, while draining, removing covers.

Xb Service, working on XB.. you get a little heat resitance as the engine is a big heat sink… spark plug out, nice combustion

Xb Service, drain plugs back on and gear box oil back

Xb Service, hooking on the little clutch tab out side the primairy cover, so it can not fall in

Xb Service, after hooking on the ramp mechanisme you can put everything back on

Xb Service, loosening the outer clutch cable adjuster and setting the free play on the ramp

Xb Service, oil filter on

Xb Service, rear caliper off to check the wheel bearings ( and the rear brake )

Xb Service, rest off the covers off and axle pinch bolts loosened

Xb Service, yep there tight some times , loosening the rear axle i like to do it with the wheel on the ground.. as i sometimes need to pull it with much force

Xb Service,wheel out to inspect the bearings and chek the belt on cracks and wear

Xb Service, wheel back in , i cleaned the axle and put some new grease on it

Xb Service, with the rear wheel in the air… 5e gear and bump the engine to check the chain for tight spots , set the free play on the tightest spot


Xb Service, old style side stand pivot , check theme for tightness ( they come loose )

Xb Service, as this one was loose, a little cleaning and new grease on… and red loctite hope it will stay on better

Xb Service, a spring puller is mighty handy putting back on the spring

Xb Service, little precare makes the clutch cable last longer … never seas on the threads

Xb Service, as i did notice a little mayo in the clutch cover check the boot for cracks and ziptie the ends closed


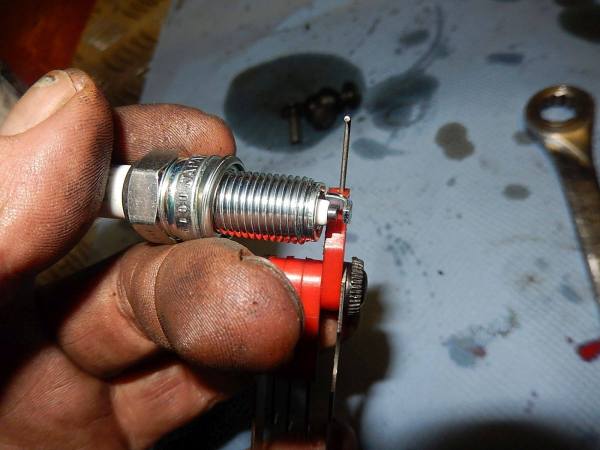
Xb Service, setting the gap on the sparkplugs, and front one ready to go in — bij Twin Motorcycles Buell Support forever.

Xb Service, she is been spuwwing a little nothing to serieus yet

Xb Service, when you work allot on these bikes you notice things in the blink off a eye.. spring clip douse not look good

Xb Service, the intake stack in not back on fully wink-emoticon

Xb Service,, pressed on complete

Xb Service,and the spring clips looks better now

Xb Service, checking spark plug wires and connectors for rubbing marks and corrosion on the terminals

Xb Service, reasr plug in and spark plug back on. hear it click on so you know it is on fully

Xb Service, nice pair off pliers is big help

Xb Service, time for the front end check up

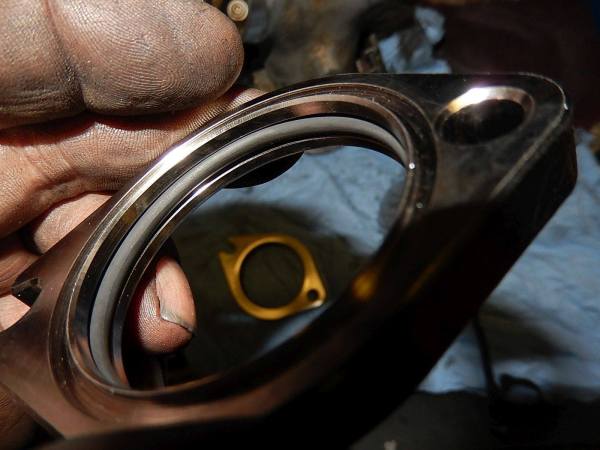
Xb Service, wheel bearings are good

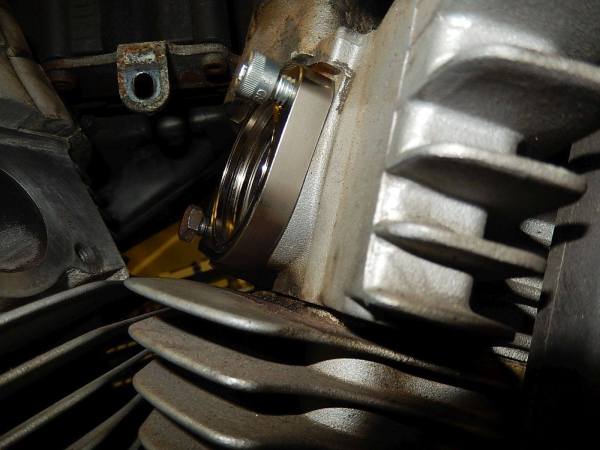
Xb Service,, forks out to change the oil

Xb Service, everything back on and some newneverseas on the axle

Xb Service, tightening up the front end

Xb Service, and brake fluid change


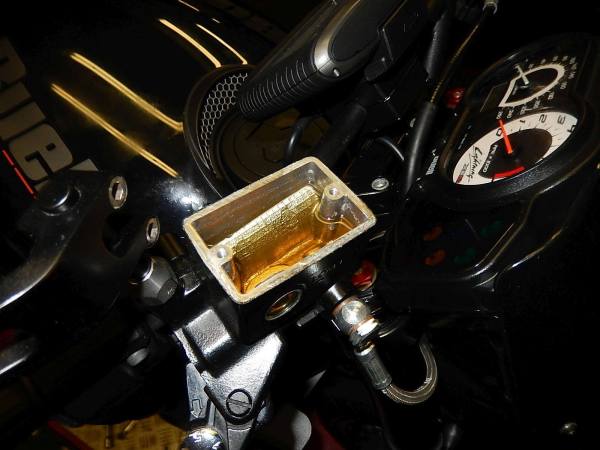
Xb Service, a S Tail section on a SS model means you need to create some room under the seat, as the rear shock is under more angle , so you need to mount a set off tail raisers , or cut the belly pan and move the battery up 2 cm , ( done here ) so little room left for the ecm — bij Twin Motorcycles Buell Support forever.


Xb Service, nicely done by the customer him self ( needed to remove the battery to swap ecm’s — bijTwin Motorcycles Buell Support forever.


Xb Service, as the customer has swapped his exhaust , he will keep the fuel mapped ecm with the old exhaust , i will put in his old stock ecm and do the fuel mapping for this exhaust on it — bij Twin Motorcycles Buell Support forever.

Xb Service,swapping ecm’s setting, means setting the tps again.


Xb Service, looking at the computer diagnostics… and the hard starting … battery problems ? customer kept it on the charger about always… battery problem? i think charging problem ! — bij Twin Motorcycles Buell Support forever.


Xb Service, mesuring the AC from the regulator all good on all leads 20 volts at idle — bij Twin Motorcycles Buell Support forever.

Xb Service, the DC out put from the regulator … 4 volts.. so basicly the battey is draining while it is running..

Xb Service… dham always happens where your out off stock… lucky we still had a works but not really good regulator at hand.. so the customer can make it home , plugged this one in and bike charges again

Xb Service, so swapping the regulator , loosening the screws

Xb Service, and pulling out the wires after removing all the zipties


Xb Service, little contact grease on the old style connector ( explained him how to change to the new style connector when he recieves the new regulator… test ride smile-emoticon — bij Twin Motorcycles Buell Support forever.

XB Brake disk trouble, braking bad.

XB Brake disk trouble , looking at the wear marks yep… looks warped

XB Brake disk trouble , very low milage.. i’m the first one to loosen this.. will lube the axle so it cannot corrode to the wheel bearings

XB Brake disk trouble , old disk off

XB Brake disk trouble , new disk.. new pads , out will the old. Braked pads 6 piston can be found here: http://www.twinmotorcycles.nl/webshop/artikel.asp?guid=YXHFSC&aid=3360&cid=9769&s&a&aname=Buell_XB912_FRONT_brake_pads_6_Piston

XB Brake disk trouble our nice waved brake disk on and tighening the axle. The disc can be found hee:http://www.twinmotorcycles.nl/webshop/artikel.asp?guid=YXHFSC&aid=3356&cid=9769&s&a&aname=Buell_XB_1125_FRONT_brake_disc_with_TUV

XB Brake disk trouble , little loctite on the caliper bolts

XB Brake disk trouble , and grab the front brake a few times… before you push the bike , as the first few grabs will not brake


http://www.twinmotorcycles.nl/artikelen.asp?cid=20&aid=761

26-9-2015 – What did we do today 25-9-2015 XB with a leak. X1 g’r done

9-2015 – What did we do today 25-9-2015 XB with a leak. X1 g’r done XB with a leak, new Buell owner bought this nice looking Firebolt, lot off km’s done and recently the motor has been refeshed… but she is leaking a little XB with a leak, did i say a little, ok more than a little looks like the cam seal is not good. XB with a leak, drilling off the rivits to get to the protection plate , the 2 philips head screw holding it on XB with a leak, yep defenaly leaking on the can seal XB with a leak, to remove the ing. sensor i needed to loosed up some wires as everything is soaked in oil , also a little clean up XB with a leak, will put the protection back over the oil sensor wire XB with a leak, sensor marked for the position, and room to take it off , for the seal you also need to take off the timing cup XB with a leak, ok.. no wonder it is leaking the engine builder forgot to put a cam seal in… honist mistake can happen  XB with a leak, new seal i like to put some assembly lube on the lips, and tap the seal in with fitting stamp / socket / pvc pipe wink-emoticon — bij Twin Motorcycles Buell Support forever. XB with a leak, timing cup back on.. low grade loctite on the bolt — bij Twin Motorcycles Buell Support forever. XB with a leak, and the pick up back on.. lining up by the markings XB with a leak, and covers back on XB with a leak, a litle clean up and re aranging the wires  XB with a leak, and the bundle off wires behind the pulley cover zip tied so they can not rattle and rubb to much  XB with a leak… almost 6 digets … and still going strong  X1 g’r done, new oil feed and return hoses put in the protective sleeves — bij Twin Motorcycles Buell Support forever. X1 g’r done, tape up the hose when you pull theme through… lyning up and mark the hoses for feed / return to put the right ones on the oil pump fittings X1 g’r done, easy / best way to connect to the oil pump is to take it off especialy for the return X1 g’r done, fighting with the startermotor to wiggle it on  X1 g’r done, starter on and routing the wires so it douse not look like spaghetti  X1 g’r done, heasders on , but not tight yet.. as we need to line up the exhaust first  X1 g’r done, primairy cover back … starting to look like something

Source: TWIN Motorcycles


9-2015 – What did we do today 25-9-2015 XB with a leak. X1 g’r done

XB with a leak, new Buell owner bought this nice looking Firebolt, lot off km’s done and recently the motor has been refeshed… but she is leaking a little

XB with a leak, did i say a little, ok more than a little looks like the cam seal is not good.

XB with a leak, drilling off the rivits to get to the protection plate , the 2 philips head screw holding it on

XB with a leak, yep defenaly leaking on the can seal

XB with a leak, to remove the ing. sensor i needed to loosed up some wires as everything is soaked in oil , also a little clean up

XB with a leak, will put the protection back over the oil sensor wire

XB with a leak, sensor marked for the position, and room to take it off , for the seal you also need to take off the timing cup

XB with a leak, ok.. no wonder it is leaking the engine builder forgot to put a cam seal in… honist mistake can happen


XB with a leak, new seal i like to put some assembly lube on the lips, and tap the seal in with fitting stamp / socket / pvc pipe wink-emoticon — bij Twin Motorcycles Buell Support forever.


XB with a leak, timing cup back on.. low grade loctite on the bolt — bij Twin Motorcycles Buell Support forever.

XB with a leak, and the pick up back on.. lining up by the markings

XB with a leak, and covers back on

XB with a leak, a litle clean up and re aranging the wires

XB with a leak, and the bundle off wires behind the pulley cover zip tied so they can not rattle and rubb to much

XB with a leak… almost 6 digets … and still going strong


X1 g’r done, new oil feed and return hoses put in the protective sleeves — bij Twin Motorcycles Buell Support forever.

X1 g’r done, tape up the hose when you pull theme through… lyning up and mark the hoses for feed / return to put the right ones on the oil pump fittings

X1 g’r done, easy / best way to connect to the oil pump is to take it off especialy for the return

X1 g’r done, fighting with the startermotor to wiggle it on

X1 g’r done, starter on and routing the wires so it douse not look like spaghetti

X1 g’r done, heasders on , but not tight yet.. as we need to line up the exhaust first

X1 g’r done, primairy cover back … starting to look like something

http://www.twinmotorcycles.nl/artikelen.asp?cid=20&aid=760

25-9-2015 – What did we do today 24-9-2015 XB9 diesel, XR1200 dirt track front end, nice XB

What did we do today 24-9-2015 XB9 diesel, XR1200 dirt track front end, nice XB

Source: TWIN Motorcycles


25-9-2015 – What did we do today 24-9-2015 XB9 diesel, XR1200 dirt track front end, nice XB

XR1200 , dirt track front end, parts came in time to finish this bike

XR1200, starting to strip as we need to get to the headlight / dash connectors the fuel tank needs to come off

XR1200, fuel tank off … i love those HD quick connectors , pulling the air filter out off the way

XR1200, head light and indicators connectors are behind the airfilter right side off the frame

XR1200, speedo , head light off

XR1200, the rest off the connectors speedo and handle bar swtiches

XR1200, after removing the upper triple t , the new headlight assembly can be put on..

XR1200, triple t back on

XR1200, was a little vague in the discription , but the OEM brake line and throttle cable guide need to come off the lower triple as there is not enough room under the new headlight assembly, so off again and now good wink-emoticon

XR1200, very nice headlight brackets

XR1200, in full glory… the plate can be painted , now shows the protective tape that was put on

XR1200, hooking up the headlight wires… i’m getting old need to take off my glasses wink-emoticon

XR1200, terminals on the new wires and ready to connect

all good.

sideview bulps mounted the right way

Nice stickers (-: if you wonder why there is so much corrosion… this bike has been living on a small isle , with lots off salty air

i noticed some things rubbing… as the original exhaust mount was removed, the pully cover needs a spacer at the bottom screw otherwise it will rub

as we noticed the Plus pole was loose.. and charging problems and cutting out … i wonder iff the negative is also loose , need to take the battery out to check

aaah yes also loose… cause off many problems

and i wonder why put bought charger leads on the same terminal… will put it right wink-emoticon

very nice colour Xb in for big service

XB diesel, cylinders cleaned and back on the rear first works better that way

Xb diesel, with the cylinders on, checking valves and putting on new valve seals

XB9 Diesel , time to put the heads back on… put the pushrod cover o-rings in the heads… before you put these on.. the other way around , very big change off dammaging the o-rings and you can do it all over again after 400 km

X1 tyre change… not optimal use off the rubber, but it comes close wink-emoticon


http://www.twinmotorcycles.nl/artikelen.asp?cid=20&aid=758

24-9-2015 – What did we do today 23-9-2015 XB12SX check up and front seals, XB9 pistons ( finaly )

What did we do today 23-9-2015 XB12SX check up and front seals, XB9 pistons ( finaly )

Source: TWIN Motorcycles


24-9-2015 – What did we do today 23-9-2015 XB12SX check up and front seals, XB9 pistons ( finaly )

very nice XB12SX 2010 model in with new owner for a total check up,

XB12SX check up, battery poles are tight

XB12SX, drain and trip, engine oil and gearbox oil

XB12SX… T27 screws…. some one has been sticking T25 in there… and slipping the tool bit :-X

XB12SX front sparky out

XB12SX, drain plugs back in… this is gearbox… with first oil change breaking in the gearbox this is normal

XB12SX, right side covers strip

XB12SX, and the old oil filter off

XB12SX, good habit to check the bearing.. little silly on a 2010 low milage, but any way check theme…

XB12SX, some one asked a few weeks ago how to spot a 2010 3 bearing wheel… well you can see the big dust seals

XB12SX, and the loose spacer on the brake side… beware off this one, wheel will not aline good when you drop this spacer ( 2010 3 bearing rear wheels only )

XB12SX, 2010 axle is black ( can be retrofitted on the older XB models ) and nice and lubed up

XB12SX, give here a spin to check the bearings

XB12SX, ok wheel back in, gearbox oil to level

XB12SX, and adjusting the clutch mechanisem

XB12SX, priming the new oil filter

XB12SX and setting the lever end play with the outer clutch cable adjuster

XB12SX, 5e gear , rear wheel in the air, and bump the engine around , to check the primairy chain for tight spots, and check the freeplay

XB12SX, ok top side remove the cover and airfilter box

XB12SX, and cehck the sparkplug wires

XB12SX, gapped and never sease ready to go in

XB12SX, airfilter base plate cleaned, and put back on

XB12SX, those T25 screws.. well at about 8 euros a piece.. i can still used theme, on a place that is not used so much… tapping a T27 bit in theme a few times to remove the burs , inside the airbox they will do

XB12SX, time for the front end , fighting the brake caliper bolts, the first time is always very hard to remove these, use good fitting tools

XB12SX, front fender off

XB12SX, strange left leg is leaking ?

XB12SX, line the slot fromt he 8 piston caliper up witht he wheels spokes push the pads a little back to remove the caliper with out damage to the wheel paint

XB12SX, front legs out

XB12SX, little isolation tape to protect the black fragile cap nut

XB12SX, and front fork striping

XB12SX, seals and guide bushings out

XB12SX, on the left side little scratches, will clean this up

XB12SX, isolation tape over the sharp edges to start and protect the seals

XB12SX, and with the trusted seal tool , hammer the oil seal home

XB12SX, do the same for the right lig

XB12SX, i like to put the c-clip on the dust seal to protect the legs during mounting

XB12SX, forks back to gettter, fill theme with 400 cc and bleed the rebound damper untill the strokes up and down feels controlled from top to bottum

XB12SX, fill a little more oil and set to level 95-97 mm airchamber in this case ( 2010 SX )

XB12SX, legs back in

XB12SXm and wheel back on…

XB12SX, making a over contact feed for the navigation, well that is already on the bike ( 2008 up ) only need to plug it in…

XB12SX, making a little more room with the speedo meter off

XB12SX, putting terminals in the cover plug that is already on the conector… and plug here up

XB12SX, off cource checking iff the acc relais is in wink-emoticon

XB12SX, fresh brake fluid in

XB12SX, checking the suspesion settings for the new owener

XB12SX, loose grips… don’t like theme

XB12SX, pulled the grip off and new glue on, feels so much better

XB12SX, heating here up for oil level check and test ride smile-emoticon

XB9 diesel… after a long time the customer gave his ok for repair… as the bike had run way to long on a fuel / diesel mixture it needed new pistons and the cylinders where bad, lucky for hime we have over size XB9 pistons wink-emoticon so cylinders where bored to oversize and a set off fresh pistons are on

XB9 Diesel… the front head was flushed clean by the diesel

XB9 diesel, the rear cylinder was sort off working , the bike came in running on 1 cylinder and smoking like a steamboot frown-emoticon


http://www.twinmotorcycles.nl/artikelen.asp?cid=20&aid=757

22-9-2015 – 19-9-2015 Buell XB small service, Buell X1 getting here done, XB12 with no compression.

22-9-2015 – 19-9-2015 Buell XB small service, Buell X1 getting here done, XB12 with no compression. Xb with very nice custom paint job, in for small check up XB small check up, drain oil while still hot XB small check up, fresh O-ring and some hydrolic loctite on the drain plug XB small check up, checking belt and removing rear wheel XB small check up, best way to check the bearings is to remove the wheel and spin the bearing by hand , these are ok XB small check up, 190 tire tough and go on the old style belt guard XB small check up, check the bolts on the shifter mechnisme, if you wiggle it around you can seen there the bolts are loose, this one the upper screw to the lever comming out off the primairy , put some loctite on !!! XB small check up, primairy chain tension ok XB small check up, old style side stand, check the pivot bolt…this one is solid smile-emoticon XB small check up, front end swap XB small check up, front wheel out to check the bearings… you can seen on the axle they have been binding, clean up and grease for protection XB small check up, caliper back on the disk and front wheel back in XB small check up, load the front suspention a few times to set the forks on the axle and tighen the pinch bolts XB small check up, wtf… that is nasty… i think this is the first time in 10 years… XB small check up, yeah i really need to clean this up first before i put even fresh fluid in XB small check up, and a little lubrication on the lever pivot and piston surface dous not hurt XB small check up, the tail light bulb went out… so much for a watter tight rear light.. some di-electric grease on the scocket and contacts for protection , and she is good to go X1 g’r done, removing the undertray to get the oil tank out X1 g’r done, bugger 1 welnut is playing hard to get out… seased in the welnutt and is spinning freely X1 g’r done, well only a few bolts extra to get the complete tail off and have some more working space X1 g’r done, i have good acces to the oil lines now but i really want to clean out the oil tank X1 g’r done, and the fittings are loose as usual X1 g’r done, took some bad words and some struggling, but i won, wellnut was corroded on the screw X1 g’r done, so oil tank out and cleaned X1 g’r done, best way to put here in top side first deeper , than in the bottum locator pins and pull the oil tank back X1 g’r done, new well nuts, stainless bolts and neverseas, she will be fine for the future X1 g’r done, breather gommet was also loose , cleaned the surfaces, and silicon kit on the gommet, puch the hose pilor in and let it dry X1 g’r done, little hydroloc loctite ont he screw in nipples helps against sweating X1 g’r done, nipples turned in and turned into position and screw on tight the counter nut X1 g’r done, ready for the new oil lines XB12XT, dropped off by the road service.. pulling a way at the traffic light and the engine stopped… starting sounds like no compression ( high starting rpm ) XB12XT no compression, ok front plug out XB12XT no compression, front plug is wet… but works with the clean spark mode XB12XT no compression, rear plug dry.. and also works XB12XT no compression, rear compression… mnnn way to little XB12XT no compression, as is the front .. tested with leak detector, and this one came out with almost no leaks ?!? mnnn well if the valves are not opening it can not suck air to make allot compression ?!?> check cam movement XB12XT no compression, as this is a 2009 model you can easy check the cam movement by removing the oil pump cover   XB12XT no compression, ok… cranks is turning but the cams / oil pump not. lets hope only the pignon gear key broke… but need to take some other stuff off first

Source: TWIN Motorcycles


22-9-2015 – 19-9-2015 Buell XB small service, Buell X1 getting here done, XB12 with no compression.

Xb with very nice custom paint job, in for small check up

XB small check up, drain oil while still hot

XB small check up, fresh O-ring and some hydrolic loctite on the drain plug

XB small check up, checking belt and removing rear wheel

XB small check up, best way to check the bearings is to remove the wheel and spin the bearing by hand , these are ok

XB small check up, 190 tire tough and go on the old style belt guard

XB small check up, check the bolts on the shifter mechnisme, if you wiggle it around you can seen there the bolts are loose, this one the upper screw to the lever comming out off the primairy , put some loctite on !!!

XB small check up, primairy chain tension ok

XB small check up, old style side stand, check the pivot bolt…this one is solid smile-emoticon

XB small check up, front end swap

XB small check up, front wheel out to check the bearings… you can seen on the axle they have been binding, clean up and grease for protection

XB small check up, caliper back on the disk and front wheel back in

XB small check up, load the front suspention a few times to set the forks on the axle and tighen the pinch bolts

XB small check up, wtf… that is nasty… i think this is the first time in 10 years…

XB small check up, yeah i really need to clean this up first before i put even fresh fluid in

XB small check up, and a little lubrication on the lever pivot and piston surface dous not hurt

XB small check up, the tail light bulb went out… so much for a watter tight rear light.. some di-electric grease on the scocket and contacts for protection , and she is good to go

X1 g’r done, removing the undertray to get the oil tank out

X1 g’r done, bugger 1 welnut is playing hard to get out… seased in the welnutt and is spinning freely

X1 g’r done, well only a few bolts extra to get the complete tail off and have some more working space

X1 g’r done, i have good acces to the oil lines now but i really want to clean out the oil tank

X1 g’r done, and the fittings are loose as usual

X1 g’r done, took some bad words and some struggling, but i won, wellnut was corroded on the screw

X1 g’r done, so oil tank out and cleaned

X1 g’r done, best way to put here in top side first deeper , than in the bottum locator pins and pull the oil tank back


X1 g’r done, new well nuts, stainless bolts and neverseas, she will be fine for the future

X1 g’r done, breather gommet was also loose , cleaned the surfaces, and silicon kit on the gommet, puch the hose pilor in and let it dry

X1 g’r done, little hydroloc loctite ont he screw in nipples helps against sweating

X1 g’r done, nipples turned in and turned into position and screw on tight the counter nut

X1 g’r done, ready for the new oil lines

XB12XT, dropped off by the road service.. pulling a way at the traffic light and the engine stopped… starting sounds like no compression ( high starting rpm )


XB12XT no compression, ok front plug out


XB12XT no compression, front plug is wet… but works with the clean spark mode

XB12XT no compression, rear plug dry.. and also works

XB12XT no compression, rear compression… mnnn way to little

XB12XT no compression, as is the front .. tested with leak detector, and this one came out with almost no leaks ?!? mnnn well if the valves are not opening it can not suck air to make allot compression ?!?> check cam movement

XB12XT no compression, as this is a 2009 model you can easy check the cam movement by removing the oil pump cover


XB12XT no compression, ok… cranks is turning but the cams / oil pump not. lets hope only the pignon gear key broke… but need to take some other stuff off first


http://www.twinmotorcycles.nl/artikelen.asp?cid=20&aid=756

18-9-2015 – What did we do today 17-9-2015 Xb Service and Header, XB12 3 gear F&%ck up , X1 g’t r done

What did we do today 17-9-2015 Xb Service and Header, XB12 3 gear F&%ck up , X1 g’t r done

Source: TWIN Motorcycles


18-9-2015 – What did we do today 17-9-2015 Xb Service and Header, XB12 3 gear F&%ck up , X1 g’t r done

Xb Service and Header, what happens when you front exhaust mount is broken ?

Xb Service and Header, well it can crack

Xb Service and Header,and probelby will lose a fuw nuts…. check your front exhaust mounting guys… you will feel a change in engine vibration when the front mount is gone.. don’t drive to long with it. Studs can be found here: http://www.twinmotorcycles.nl/webshop/artikel.asp?guid=YXHFSC&aid=3602&cid=0&s=2401-0126+%2F990176&a&aname=Buell_and_Sportster_Exhaust_port_studs_and_Nuts

Xb Service and Header, front seals gone on the front fork

Xb Service and Header,and a almost ready clutch cable, cluctch cable can be found here: http://www.twinmotorcycles.nl/webshop/artikel.asp?guid=YXHFSC&aid=59&cid=0&s=38613-03C&a&aname=Buell_XB9S12S_2003-2010_Clutch_cable_

Xb Service and Header, rear wheel out, for new bearings , exhaust off to rotate the engine and oil change

Xb Service and Header, covers off and making ready for the headers change

Xb Service and Header, the engine douse not have to be rotate very far… you only need to acces the rear header nuts

Xb Service and Header, and unplug the O2 sensor

Xb Service and Header,new header back on and engine up again. The headers can be fund he: http://www.twinmotorcycles.nl/webshop/artikel.asp?guid=YXHFSC&aid=1696&cid=0&s=S0101.1AAA&a&aname=Buell_XB12_original_new_header_2004-2007

Xb Service and Header, time for the front end

XB12 3 gear F&%ck up, on with this bike.. oil drain from the swing arm

XB12 3 gear F&%ck up while it is draining remove allot off stuff side stand off euro model with switch

XB12 3 gear F&%ck up, loosening the rear axle to get the belt off

XB12 3 gear F&%ck up, belt out off the way in a wasy the bike still can be moved

XB12 3 gear F&%ck up, loosening the oil line retainer to get to the wires behind this

XB12 3 gear F&%ck up, as the engine is going to be split , i drain the case oil also.. less messy when you split the cases

XB12 3 gear F&%ck up, oil ine clips off to pull ou the oil lines

XB12 3 gear F&%ck up, handy little stop plugs will protect the oil line fittings and stop from leaking

XB12 3 gear F&%ck up, and caps on the oil line ends

XB12 3 gear F&%ck up, starter motor connector push with a flat head screw driver under the connector to un lock it , and pull it off

XB12 3 gear F&%ck up, speed sensor out , not really much metal on the magnetic sensor , and remove the power feed to the starter motor

XB12 3 gear F&%ck up, first engine down.. to remove the headers and make some room to remove ther cooler lines and v-brace

XB12 3 gear F&%ck up, v-brace with oil cooler and regulator off , time to make it a little lighter

XB12 3 gear F&%ck up, primairy drive off

XB12 3 gear F&%ck up, shifter axle out

XB12 3 gear F&%ck up, and stator out , remvoe the starter motor bolts on this side , and pull out the startermotor from the other sise

XB12 3 gear F&%ck up, swing arm axle loose and out , with the engine supported

XB12 3 gear F&%ck up, and the rear mounting bolt out

XB12 3 gear F&%ck up, with the engine still inplace easy to loosen the front mounting bolts in teh head

XB12 3 gear F&%ck up, time to put the bike in the hoist to support the rear , drop the engine some , and loosen the last connectors

XB12 3 gear F&%ck up, engine down… pull out the gearbox breather hose

XB12 3 gear F&%ck up, taping up the frame to protect from damaging and a ratchet strap over the frame and into the swing arm hole, and place some pieces off wood between theme and tighten the ratched.. so you can move the bike ( you will need a front wheel support as there is no side stand )


XB12 3 gear F&%ck up, removing the last things… i wish i had to time to do this one my self, as i find it very interesting what when wrong… but really i don’t have the time for it… so many other bikes and projects need my attention, so off to the machine shop who will clean, strip , measure everything ( bore , valves ect ) and determin what is wrong with the gear box .. so off to our machine shop with it — bij Twin Motorcycles Buell Support forever.


X1 g’t r done, ? why would anybody take this screw out ? M5 btw.. will put a new one in before i put the throttle body on — bij Twin Motorcycles Buell Support forever.


X1 g’t r done, mnn other thing missing, the throttle cable safety bracket… — bij Twin Motorcycles Buell Support forever.


X1 g’t r done, easy made a little safety so the wires can not come out and leave the bike in full throttle , some lock wire will help — bij Twin Motorcycles Buell Support forever.


X1 g’t r done, lyning uo the intake manifold — bij Twin Motorcycles Buell Support forever.


X1 g’t r done, and fasten the screws — bij Twin Motorcycles Buell Support forever.


X1 g’t r done, hooking up the injector wires.. will give the wires some more room as this is to tight and to much pulling on the connectors , can cause the wires to break just inside the connectors — bij Twin Motorcycles Buell Support forever.


X1 g’t r done, pick up , ok by eye ball ,, will set corerctly when we have power — bij Twin Motorcycles Buell Support forever.


X1 g’t r done, mnnn oil lines need replacement , will clean the oil tank to after a engine broke down , smart thing to do.. — bij Twin Motorcycles Buell Support forever.

X1 g’t r done, regulator back on , fix the ground good to the reasr off the regulastor — bij Twin Motorcycles Buell Support forever.


X1 g’t r done, wire mix up can happen very easy… as the speed sensor and the ignition pick use the same connector… you will not the first who is looking why the bike is not starting wink-emoticon — bij Twin Motorcycles Buell Support forever.


http://www.twinmotorcycles.nl/artikelen.asp?cid=20&aid=754

17-9-2015 – What did we do toda 16-9-2015 1125CR TQ hammer and lights, Xb fork seal, , XR1200 mist a shift , 1125R belt , XB 3e gear F*&ck up

What did we do toda 16-9-2015 1125CR TQ hammer and lights, Xb fork seal, , XR1200 mist a shift , 1125R belt , XB 3e gear F*&ck up

Source: TWIN Motorcycles


17-9-2015 – What did we do toda 16-9-2015 1125CR TQ hammer and lights, Xb fork seal, , XR1200 mist a shift , 1125R belt , XB 3e gear F*&ck up

Beautiful 1125CR in for a TQ hammer exhaust , as the Jardine with DB killer ( home made ) sounds bad ( like a exhaust leak wink-emoticon )

1125CR TQ hammer, off with the old

1125CR TQ, as the customer loosened the front headers a few time to change exhaust.. he asked us to replace the gasket, so take off the header

1125CR TQ hammer, clean up the surfaces

1125CR TQ hammer, and new gasket on , will not tighten the nut competely, as i want to line up the header to the pipe can be ordered here: http://www.twinmotorcycles.nl/webshop/artikel.asp?guid=YXHFSC&aid=1848

1125CR TQ hammer, TQ hammer front pipe on exhaust can be found here: http://www.twinmotorcycles.nl/webshop/artikel.asp?guid=YXHFSC&aid=5149&cid=0&s=Buell1125TH2&a&aname=Buell_1125_Torque_Hammer_2_exhaust

1125CR TQ hammer, and mufler one exhaust can be found here: http://www.twinmotorcycles.nl/webshop/artikel.asp?guid=YXHFSC&aid=5149&cid=0&s=Buell1125TH2&a&aname=Buell_1125_Torque_Hammer_2_exhaust

1125CR TQ hammer, lining everything up, you can move it allot where you want it to go exhaust can be found here: http://www.twinmotorcycles.nl/webshop/artikel.asp?guid=YXHFSC&aid=5149&cid=0&s=Buell1125TH2&a&aname=Buell_1125_Torque_Hammer_2_exhaust

1125CR TQ hammer, alining front bracket exhaust can be found here: http://www.twinmotorcycles.nl/webshop/artikel.asp?guid=YXHFSC&aid=5149&cid=0&s=Buell1125TH2&a&aname=Buell_1125_Torque_Hammer_2_exhaust

1125CR TQ hammer, and tightening everything up starting with the front header working your way down to the rear exhaust can be found here: http://www.twinmotorcycles.nl/webshop/artikel.asp?guid=YXHFSC&aid=5149&cid=0&s=Buell1125TH2&a&aname=Buell_1125_Torque_Hammer_2_exhaust

1125CR TQ hammer, customer wants to get right off the oem mirrors… thast is a nice place to drill a hole for front indicators

1125CR TQ hammer, nice kellerman rhombus indicators are used, put a little low grade loctite on the rubber mount so the indicator body will not come loose on it own Kellerman can be found here or type Rhomus in search function: http://www.twinmotorcycles.nl/webshop/artikel.asp?guid=YXHFSC&aid=10807&cid=0&s=rhombus&a&aname=KELLERMANN_MICRO_RHOMBUS_DARK_FRRL

1125CR TQ hammer, on the bike Kellerman can be found here or type Rhomus in search function: http://www.twinmotorcycles.nl/webshop/artikel.asp?guid=YXHFSC&aid=10807&cid=0&s=rhombus&a&aname=KELLERMANN_MICRO_RHOMBUS_DARK_FRRL

1125CR TQ hammer, a little heast shrink to protect the wires , and hooking up the connectors… LED realy wants grond to ground and feed to feed Kellerman can be found here or type Rhomus in search function:http://www.twinmotorcycles.nl/webshop/artikel.asp?guid=YXHFSC&aid=10807&cid=0&s=rhombus&a&aname=KELLERMANN_MICRO_RHOMBUS_DARK_FRRL

1125CR TQ hammer, testing 1..2 nice and the resitance is about the same do the blink rate is normal Kellerman can be found here or type Rhomus in search function: http://www.twinmotorcycles.nl/webshop/artikel.asp?guid=YXHFSC&aid=10807&cid=0&s=rhombus&a&aname=KELLERMANN_MICRO_RHOMBUS_DARK_FRRL

1125CR TQ hammer, mean looking smile-emoticon mirrors will come next ( has not made up his mind yet ) Kellerman can be found here or type Rhomus in search function:http://www.twinmotorcycles.nl/webshop/artikel.asp?guid=YXHFSC&aid=10807&cid=0&s=rhombus&a&aname=KELLERMANN_MICRO_RHOMBUS_DARK_FRRL

1125CR TQ hammer, upgrading the fuel mapping and let the smoke out, see how she is runing. For this exhaust it’s a must to update the ECM it needs fuel for Torque can be found here: http://www.twinmotorcycles.nl/webshop/artikel.asp?guid=YXHFSC&aid=2443&cid=0&s=reflash&a&aname=TM_ECM_Reflash__all_models

1125CR TQ hammer, sexy pipe smile-emoticon and with DB eater in nice and rubmle but to too loud. The complete kit can be found here: http://www.twinmotorcycles.nl/webshop/artikel.asp?guid=YXHFSC&aid=10925&cid=9669&s&a&aname=Buell_1125_Stage_1_Kit_from_Twin_Motorcycles

XB fork seals… ride side always first to go… brake dust…

XB fork seals, wheel out and caliper off, clean up the leg first be fore i take it apart

XB fork seals, lower slider out

XB fork seals. leg cleaned up, and some protection ( isolation tape ) to protect from sharp edges , to put the new seals on

XB fork seals, drive the oil seal home with the fork seal tool, i like to do this in a aria on the leg where the seals don’t come normaly

XB fork seals, new oil in and bleed the damper by pumping it up end down, untill you feel a even resistance all the way

XB fork seals, fork back in , pads are not soaked so they will go , but cleaned up the caliper new pads can be found here: http://www.twinmotorcycles.nl/webshop/artikel.asp?guid=YXHFSC&aid=3360&cid=9769&s&a&aname=Buell_XB912_FRONT_brake_pads_6_Piston

XB fork seals, ca;iper and wheel back on

XB fork seals,ans stt fenders back on

XB fork seals, press down the suspention a few times before you tighten the pinch bolts, and check the rebound settings

XR1200, came in for gearbox problems as it could not shift, coming over the problem seams to have fixed it self, as the shifter works beutifull but will check some things

XR1200, shifter, the shift lever is loose , not really nice but would not cause this

XR1200, shifter, the drain plug douse not look that bad… normal debris for a gear box plug

XR1200, shifter, shifter off

XR1200, shifter, clutch mechnisme out

XR1200, shifter, and taking off the cover to look at the shifter mechnisme

XR1200, shifter, shifter palls look ok.. springs are perfect

XR1200, shifter, clutch hub bearing is ok , counterchaft bolt is tight

XR1200, shifter, well trying to shift for about 15 minutes.. works flawless… , one step further would be to split the cases to check for wear in the gearbox, but with out clear indication and everything working just fine… not something i would do now

XR1200, shifter, so cover back on TQ down the crews starting in the middle and spiraling out

XR1200, shifter, fresh oil , to level and clutch mechnisme adjusted

XR1200, shifter back on with a little loctite

XR1200, shifter, as this shifter need a little play locking the counter nut to this can no longer run out

XR1200, shifter, and adjusting the outer clutch cable

1125R standed .. missing a piece off rubber some where

1125R belt , unscrewing covers

1125R belt, and taking out the swingarm piece

1125R belt, this makes just enough room to silde the new belt in

1125R belt, remove the 2 front bolts on the foot peg bracket

1125R belt, and catch the spacers

1125R belt, and loosen the idler pully bolt

1125R belt, so you can rotate this to put the belt on

1125R belt, wheel axle pich bolt loose

1125R belt, and loose the axle

1125R belt, better save than sorry, take out the wheel to check the bearings as they need to be in perfect condition for the tight new belt , removing the rear caliper bolts

1125R belt, and take the caliper off

1125R belt, bearings are perfect…

1125R belt, but axle shows a little seasing corrosion ( bearings freezing on the axle )

1125R belt, cleaning up the axle… Bling , and gease here up like a eal in a bucket off snot

1125R belt, ok on with the belt, in the front pulley rim there is a little bend piece to help you get the belt on. Belt can be found here: http://www.twinmotorcycles.nl/webshop/artikel.asp?guid=YXHFSC&aid=2564&cid=0&s=G0500.1ATB&a&aname=Buell_1125CR_2009-2010_drive_belt_

1125R belt, belt on the front pulley , put the footpeg bracket back in place Belt can be found here: http://www.twinmotorcycles.nl/webshop/artikel.asp?guid=YXHFSC&aid=2564&cid=0&s=G0500.1ATB&a&aname=Buell_1125CR_2009-2010_drive_belt_

1125R belt, before you tighten the belt put the swing arm pievce back in and tighten the bolts Belt can be found here: http://www.twinmotorcycles.nl/webshop/artikel.asp?guid=YXHFSC&aid=2564&cid=0&s=G0500.1ATB&a&aname=Buell_1125CR_2009-2010_drive_belt_

1125R belt, a little wressle and start the belt on the pully and turn the wheel to help, don’t pry to hard Belt can be found here: http://www.twinmotorcycles.nl/webshop/artikel.asp?guid=YXHFSC&aid=2564&cid=0&s=G0500.1ATB&a&aname=Buell_1125CR_2009-2010_drive_belt_

1125R belt, thighen the axle i rotate the wheel during this Belt can be found here: http://www.twinmotorcycles.nl/webshop/artikel.asp?guid=YXHFSC&aid=2564&cid=0&s=G0500.1ATB&a&aname=Buell_1125CR_2009-2010_drive_belt_

1125R belt, and rear axe to TQ settings ( 66 NM ) Belt can be found here: http://www.twinmotorcycles.nl/webshop/artikel.asp?guid=YXHFSC&aid=2564&cid=0&s=G0500.1ATB&a&aname=Buell_1125CR_2009-2010_drive_belt_

1125R belt covers back on and tighten the pinch bolt Belt can be found here: http://www.twinmotorcycles.nl/webshop/artikel.asp?guid=YXHFSC&aid=2564&cid=0&s=G0500.1ATB&a&aname=Buell_1125CR_2009-2010_drive_belt_

1125R belt, old belt was there to check… as the pulleys are ok… there are some stone chip signs
( belt has only one 13000 km ) Belt can be found here:http://www.twinmotorcycles.nl/webshop/artikel.asp?guid=YXHFSC&aid=2564&cid=0&s=G0500.1ATB&a&aname=Buell_1125CR_2009-2010_drive_belt_

http://www.twinmotorcycles.nl/artikelen.asp?cid=20&aid=753

15-9-2015 – What did we do today 12-9-2015, XB header porn, XR1200 TLC

What did we do today 12-9-2015, XB header porn, XR1200 TLC

Source: TWIN Motorcycles


15-9-2015 – What did we do today 12-9-2015, XB header porn, XR1200 TLC

XB header porn, very nice 2010 SX in for some checks and header upgrade

XB header porn, while the bike is riden very little, some things still go bad , neutral switch not working

XB header porn, open airbox mod.. the stud turns with the nut :-X the airbox kit can be found here: http://www.twinmotorcycles.nl/webshop/artikel.asp?guid=YXHFSC&aid=10651&cid=0&s=ASBA9304&a&aname=Buell_XB_912_03-10_Open_Airbox_Conversion_Kit

XB header porn,so pulled off the complete lower airbox… stack off and ready to rotate the engine

XB header porn, spoiler and brackets loose to remove the exhaust 2008-2010 Torque Hammer: http://www.twinmotorcycles.nl/webshop/artikel.asp?guid=YXHFSC&aid=3077&cid=0&s=0810912S&a&aname=Buell_XB_912_Torque_Hammer_exhaust_2008_-2010_

XB header porn, loosening the belt to get the tensioner off

XB header porn, so little km done. but dry crack in the belt… what to do… customer was going to safe , will mount a new belt

XB header porn, multiple guess witch ones where the mounting screws again wink-emoticon remove the cover to get the belt off red pully cover can be found here: http://www.twinmotorcycles.nl/webshop/artikel.asp?guid=YXHFSC&aid=2924&cid=0&s=FS207518R&a&aname=Buell_XB_Red_Pully_Cover

XB header porn, exhaust off and oil change

XB header porn, left scoop off, and loosen the wires before you rotate the engine down

XB header porn, let foot peg plate off, as this will tough the primary cover while rotating the engine

XB header porn, clutch cable unhooked from the lever and right scoop off

XB header porn, and v-brace loose

XB header porn, belt removed from the pulley and mesuring the neutral switch… still works ish… but to much resistance to make a connection. Switch can be found here: http://www.twinmotorcycles.nl/webshop/artikel.asp?guid=YXHFSC&aid=206&cid=0&s=33900-99&a&aname=Buell_and_Sportster_Transmission_Neutral_Switch

XB header porn, spark plug wire pliers helps to take the plug off the neutral switch Switch can be found here: http://www.twinmotorcycles.nl/webshop/artikel.asp?guid=YXHFSC&aid=206&cid=0&s=33900-99&a&aname=Buell_and_Sportster_Transmission_Neutral_Switch

XB header porn,thin walled 5/8 socket , it will just go , not perfect but it works.. lot off people have difficulty to remove the pulley, and this is a perfect work around Switch can be found here: http://www.twinmotorcycles.nl/webshop/artikel.asp?guid=YXHFSC&aid=206&cid=0&s=33900-99&a&aname=Buell_and_Sportster_Transmission_Neutral_Switch

XB header porn, new switch in , and checking resistance…works Switch can be found here: http://www.twinmotorcycles.nl/webshop/artikel.asp?guid=YXHFSC&aid=206&cid=0&s=33900-99&a&aname=Buell_and_Sportster_Transmission_Neutral_Switch

XB header porn, mmnn missing a screw… will put a new one in. removing the right foot peg plate to make room to change the belt

XB header porn,swingarm brace out , and belt can be removed

XB header porn, new belt on , swing arm brace back on first, and use some loctite on the screws , als on the footpeg plate screws

XB header porn, on with the headers… front O2 sensor out

XB header porn, and loosen the header bolts

XB header porn, drop the engine and disconnect the reasr o2 sensor

XB header porn, clamps and c-clips put on the new heasder a little never seas, on the o2 sensor and headers on. nice. Header can be found here: http://www.twinmotorcycles.nl/webshop/artikel.asp?guid=YXHFSC&aid=10675&cid=0&s=TM452010&a&aname=Buell_XB_2010_model_45mm_headers_

XB header porn,engine back up and start to rebuild. Header can be found here: http://www.twinmotorcycles.nl/webshop/artikel.asp?guid=YXHFSC&aid=10675&cid=0&s=TM452010&a&aname=Buell_XB_2010_model_45mm_headers_

XB header porn, as we use the same body for all model XB TQ hammers exhaust… easy swap from Euro 08-10 headers to world header exhaust http://www.twinmotorcycles.nl/webshop/artikel.asp?guid=YXHFSC&aid=3085&cid=0&s=TBOS0410912s&a&aname=Buell_Torque_Hammer_exhaust_EU_03-07_USA_03-10

XB header porn, new connection piece on, looks allot better than the 63 mm connection exhaust http://www.twinmotorcycles.nl/webshop/artikel.asp?guid=YXHFSC&aid=3085&cid=0&s=TBOS0410912s&a&aname=Buell_Torque_Hammer_exhaust_EU_03-07_USA_03-10

XB header porn, exhaust mounted, belt and idler pully back on , pulley cover back on

XB header porn, as the headers are bigger, a little room needs to be made in the right airscoop Header can be found here: http://www.twinmotorcycles.nl/webshop/artikel.asp?guid=YXHFSC&aid=10675&cid=0&s=TM452010&a&aname=Buell_XB_2010_model_45mm_headers_

XB header porn, freaking nice Header can be found here: http://www.twinmotorcycles.nl/webshop/artikel.asp?guid=YXHFSC&aid=10675&cid=0&s=TM452010&a&aname=Buell_XB_2010_model_45mm_headers_

XB header porn, updating the fuel mapping and letting the smoke out…

On with the XR1200.. as it needs allot off love… new oil drain hose on

XR1200 TLC, new airfilter… i love this construction when the screw are corroded in :-X K&N replacement filter: http://www.twinmotorcycles.nl/webshop/artikel.asp?guid=YXHFSC&aid=3269&cid=0&s=HD1208-909584&a&aname=XR1200_KN_High_performance_airfilter_

XR1200 TLC, K&N filter in the box… took out the euro flapper but left the solinoid in so it will not produce a error code K&N replacement filter: http://www.twinmotorcycles.nl/webshop/artikel.asp?guid=YXHFSC&aid=3269&cid=0&s=HD1208-909584&a&aname=XR1200_KN_High_performance_airfilter_

XR1200 TLC, oil tank cover back on and some oil in

XR1200 TLC, fuel tank back in place… nice with with the quick release connections

XR1200 TLC, i wonder why the exhaust was noisy.. rear O2 sensor was loose wink-emoticon

XR1200 TLC, front fork spring upgrade and some fresh oil , and bearings check

XR1200 TLC, the bike has had a rough life.. the salty sea air on Aruba has done it no good

XR1200 TLC, front axle nut off

XR1200 TLC, pinch bolt out , and calipers off

XR1200 TLC, wheel out and 2 screws holding the forks

XR1200 TLC, rust pitting on the front fork… will try to clean it up and don’t push the forks completly in while replaceing the springs, hope the seals will hold, other wise this will need new lower legs

XR1200 TLC, odd constuction , one leg is compression side, the other rebound dampening

XR1200 TLC, the progressive springs are a little shorter but work so much better

XR1200 TLC, as douse pushing the legs a little higher in the triple t , bike will handle much better

XR1200 TLC, the other leg looks for familiar to me in construction wink-emoticon

XR1200 TLC, leg in , wheel in brakes on, time to start here up


http://www.twinmotorcycles.nl/artikelen.asp?cid=20&aid=752

13-9-2015 – 11-9-2015 XR1200 oil leak, Uly service with a little extra, Uly power upgrade and case rack

11-9-2015 XR1200 oil leak, Uly service with a little extra, Uly power upgrade and case rack

Source: TWIN Motorcycles


13-9-2015 – 11-9-2015 XR1200 oil leak, Uly service with a little extra, Uly power upgrade and case rack

XR1200 oil leak, the XR1200 is needed allot off love, as the bike was leaking oil on the most strange places , mostly loose connections, but this one was odd, and took some time for HD to deliver the drain hose , as this one is cracked

XR1200 oil leak,, will ok this is how far i got to day :~( … did i mention we are very bussy wink-emoticon phone , customers , bikes , email , hope to catch up a little tinker time on this bike to morrow

Uly service, brought in for a small service, but with some repairs comming

Uly service, draining the oil… really the 2008 up engines are better 45000 km on this one , hard… and no reall signs off ware in the oil

Uly service, yep they do shake chin spoilers don’t like it … repaired with a aluminium plate riveted on

Uly service, covers off , also for belt replacement

Uly service, axle loose 15 turns to get the belt tension off

Uly service, desiced to take the wheel out , as the axle was binding on the bearings and pushed one out

Uly service, note the corrosion on the axle

Uly service, funny that so little corrosion can be so strong

Uly service, so cleaning the axle and grease r’ up


Uly service, belt change take out the nackered looking screws and i will put new ones in

Uly service,new belt in place

Uly service,first tighten the swingarm brace , fo the foot peg plate with a case rack starting the bolt helps

Uly service, when in dought… new belt , new wheel bearings as the tension on the new oem belts is very high

Uly service, checking primairy chain tension

Uly service,checking the front end

Uly service, the front fender covers , cover also the sight.. as the front fork seals are leaking , but owner did not notice this

Uly service,, so front wheel out, and caliper off

Uly service,loosen the pinch bolts and the axle

Uly service,and replacing the seals

Uly service, fork back to getter, lube the front axle and wheel back in

Uly service, running warm to check the oil level, and test ride

Uly service, as i notice the licence plate light was not working, remove the 2 nuts holing the light holder

Uly service, take out the fitting and bulb

Uly service, replave for a new one , test it befor you put everything back,


Uly power upgrade. very nice bike
other wise called rust moval

Uly power upgrade, loosening the exhaust mounting points.. now to cool it a little , and do the other job

Uly power upgrade, mounting the case rack.. very rare for us to have a used set availeble, and was all ready spoken for before we had it , removing the screws in the undertray

Uly power upgrade, mnn left handle grip is loose , will tighten it right away


Uly power upgrade, very easy rack to mount

Uly power upgrade, on with the exhaust , off and disconect the valve cable

Uly power upgrade, side stand off to mount the chin spoiler brackets

Uly power upgrade, and a nice exhaust slipped on

Uly power upgrade, after tightening all releave the tension by tapping the header connection, and tightening the clamps

Uly power upgrade, disconnect the solinoid cable and hook it out the cam , so this can move freely

Uly power upgrade, some heat shrink on the solinoid cable to protect against rubbing and ziptie behind the pully cover

Uly power upgrade, right fuel mapping in the ecm… and test ride


http://www.twinmotorcycles.nl/artikelen.asp?cid=20&aid=751

12-9-2015 – What did we do today 10-9-2015 X1 ets, Smoking 883, XB intake seals Part 2 , XR1200 TLC

What did we do today 10-9-2015 X1 ets, Smoking 883, XB intake seals Part 2 , XR1200 TLC

Source: TWIN Motorcycles


12-9-2015 – What did we do today 10-9-2015 X1 ets, Smoking 883, XB intake seals Part 2 , XR1200 TLC

X1 in to check the bad stuter and bad riding , sometimes.. most difficult to find, as it is not everytime


X1 ets, as there was a historic error Engine temp sensor, will start to have a look at this one , cover and fuel cell off — bij Twin Motorcycles Buell Support forever.

X1 ets, with the fuel cell off you can get to the temp sensor hidden in the reasr head

X1 ets, with the sensor out, ( need to be grounded to check ) heating it up and checking the readings on the computer.. when above 120 deg.. the sensor readings go hayware , adjusting the fuel with more than 160 % , well that would be a cause off the sutter and really fat running

X1 ets, to be sure checking the cable harness on the sensor wire for hidding cracks or bad contacts

X1 ets, new sensor in , running perfect… but feeling the cylinders i could feel a little knock.. mnnnn

X1 ets, magnet on a stick in the oil tank, came out not really nice… fine metal dustdebris in the oil tank, pritty sure a crank bearing is on it’s way out , some times i hate to be the messenger


Smoking 883, new parts arrived, time to close here up.. rotor back on red loctite on the threads

Smoking 883, soaking the new plates in gearbox oil ( atf type D4 )

Smoking 883, and after 15 minutes stacking theme back on the hub / basket

Smoking 883, the BDL plate kit come with a little heavier spring.. will use this one ( 1,85 mm thick to stock 1,75 )


Smoking 883, new pulling plate with out a ware edge — bij Twin Motorcycles Buell Support forever.

Smoking 883, commen problem when taking out the c-clip to many times, will not seat good anymore and has become oval, best to replace

Smoking 883, new c-clip time to put the spring back on

Smoking 883, clutch tool to the pulling plate and seating the c-clip and c-clip support ring

Smoking 883, some where between the dealer who took it apart and out place the position dowels have gone missing

Smoking 883, not to worry we have theme.. makes mounting the gasket and cover allot easier and in the correct position

Smoking 883, little drop off loctite on the cover screws.. good habit after years off racing with these

Smoking 883, tightening the cover screw… start in the middle and spiral out

Smoking 883, clutch cable back in and oil to level

Smoking 883, after adjusting the primairy chain, covers can be put on

Smoking 883, and clutch cable back on… now first to charge the battery.. to do a test ride

Xb intake seals, part 2… the seconed time everyting is easyer… but i will mount our intake flanges on this bike.. will not do this again

Xb intake seals, part 2, engine down, and loosening the manifold —

Xb intake seals, part 2, while down i replace the spark plugs right way.. as they look very nasty

Xb intake seals, part 2, yep very nasty , the odo reading on the bike is really not how much the bike has done..

Xb intake seals, part 2, while we are at it , i will replace the corroded cables too

Xb intake seals, part 2, ok intake flanges… test fitting on the runners… perfect… nice and tight 3.

Xb intake seals, part 2, rear one to

Xb intake seals, part 2, and as our flanges are much ticker than the stock ones.. checking the clearance to the heads… perfect

Xb intake seals, part 2, inner O ring in the groove , and lube theme up with the mounting grease

Xb intake seals, part 2, greased up, and pressed on the intake, you will need a little force to press theme on , so the o-rings compress and expand in the groove make the gas tight seal —

Xb intake seals, part 2, rest off the mounting grease in the out side groove , and seat the o-ring , the grease will hold theme during mounting

Xb intake seals, part 2, you can turn the flanges so the holes line up


Xb intake seals, part 2, and tighen the screws.

Xb intake seals, part 2, engine back up

Xb intake seals, part 2, and make some noice smile-emoticon she runs sweet…

Xb intake seals, part 2, not sure what they where thinking… breather re-route and use the gearbox breather hose connected to the head breathers… full close system ?! , anyway i put everything back to stock condition.. also to see in a few 1000 km if there is oil build up in the airbox.. as a sign that the piston rings are worn out , she rides really nice now

XR1200 TLC , yep still worked —

XR1200 TLC, usualy a left side crash will bend the foot peg screws.. i will put some new ones in

XR1200 TLC, almost through it

XR1200 TLC, bling new cover on

XR1200 TLC, new shift lever and too peg… to morrow on with the rest off this bike as she needs a lot off love


http://www.twinmotorcycles.nl/artikelen.asp?cid=20&aid=750