Monthly Archives: March 2019

What did we do today 12-1-2018 Buell XB120X exhaust retainer clips broken, Buell S1 fork seals

What did we do today 12-1-2018 Buell XB120X exhaust retainer clips broken, Buell S1 fork seals

Uly time — at Twin Motorcycles Buell Support forever.

somthing fishy at the front header pipe — at Twin Motorcycles Buell Support forever.

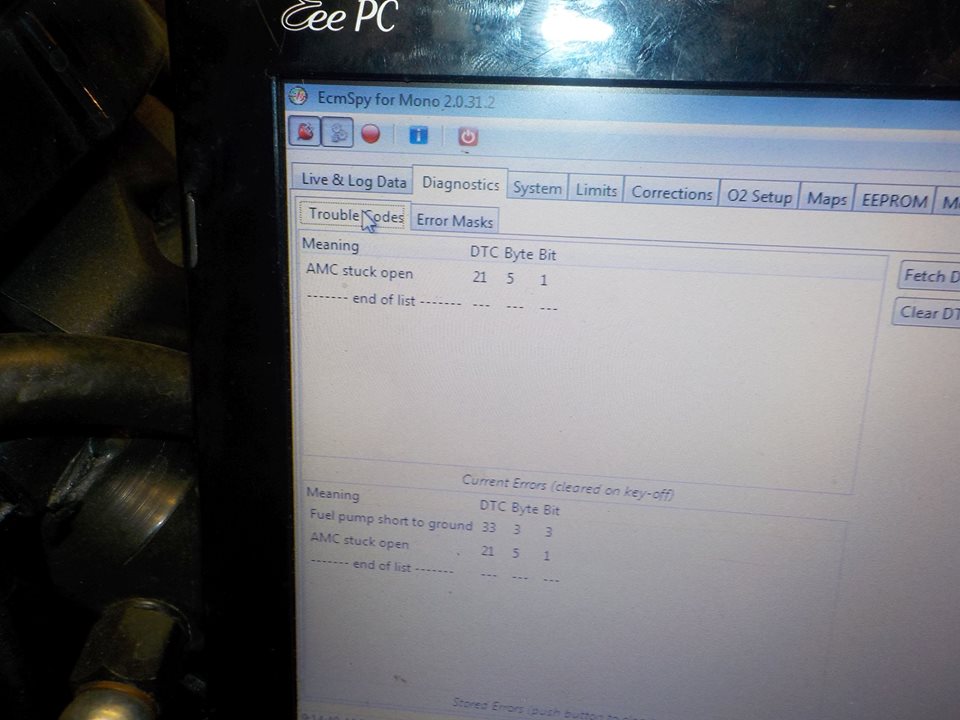
and neutral switch is broken — at Twin Motorcycles Buell Support forever.

we need to rotate the engine down to fix this so airbox off — at Twin Motorcycles Buell Support forever.

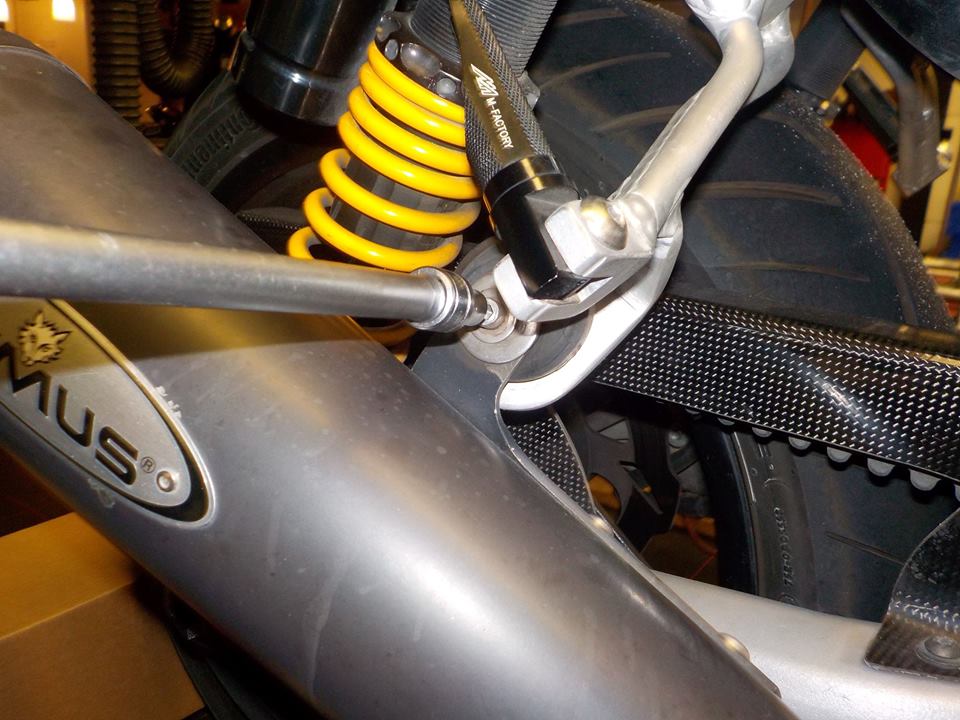
top tie rod loose — at Twin Motorcycles Buell Support forever.

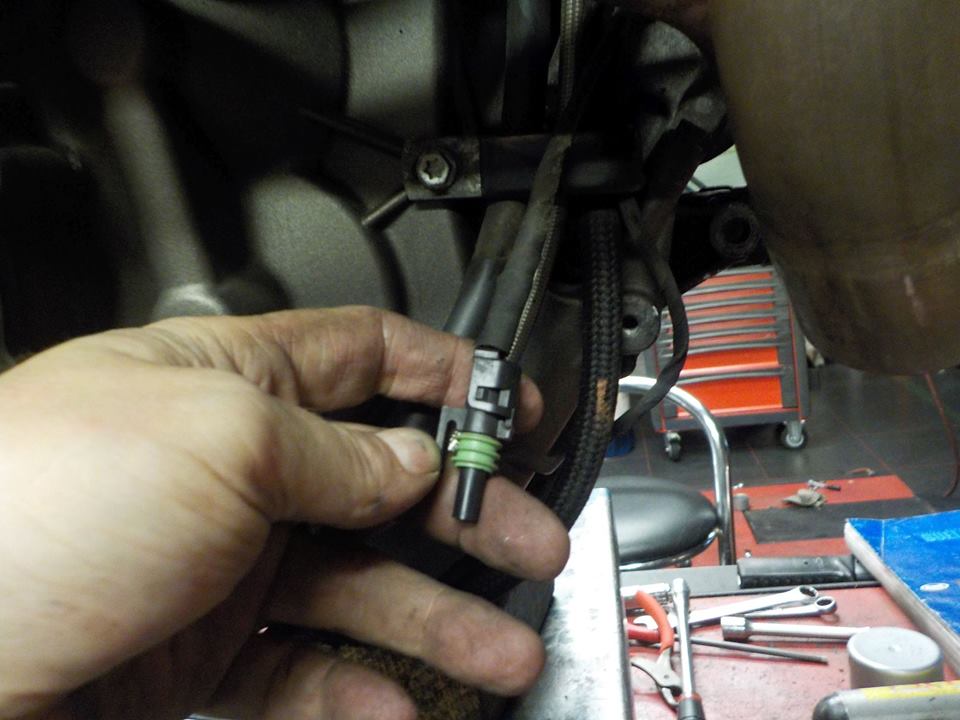
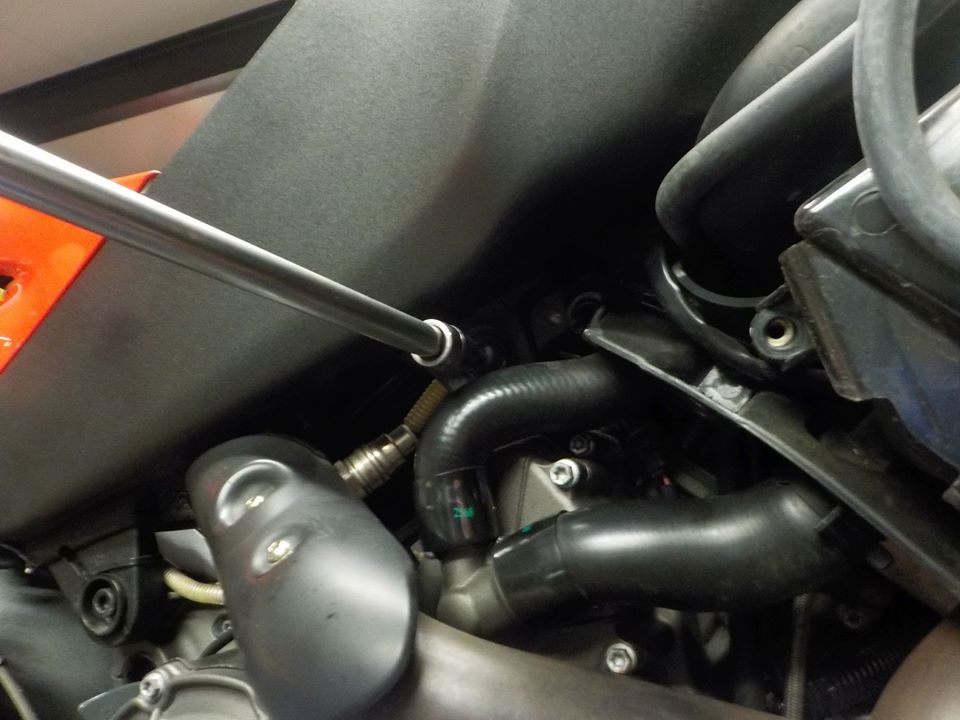
O2 sensor connector loose , as we need to take the headers of — at Twin Motorcycles Buell Support forever.

moving from up to down… scoops loose — at Twin Motorcycles Buell Support forever.

the temp fix removed — at Twin Motorcycles Buell Support forever.


exhaust needs to come of — at Twin Motorcycles Buell Support forever.

and loosening the rear straps — at Twin Motorcycles Buell Support forever.

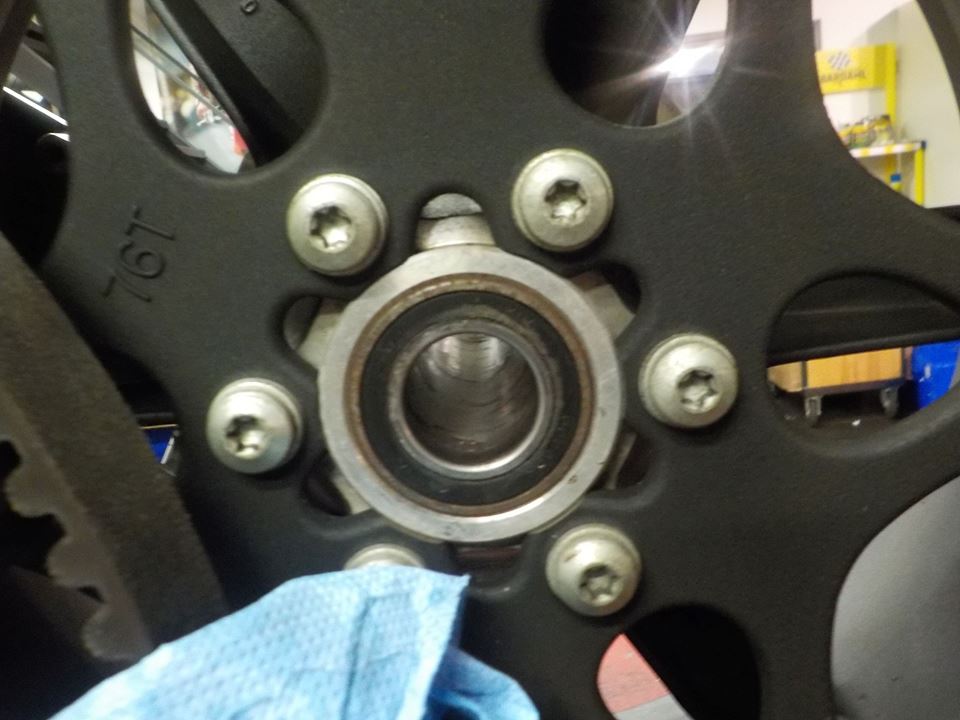
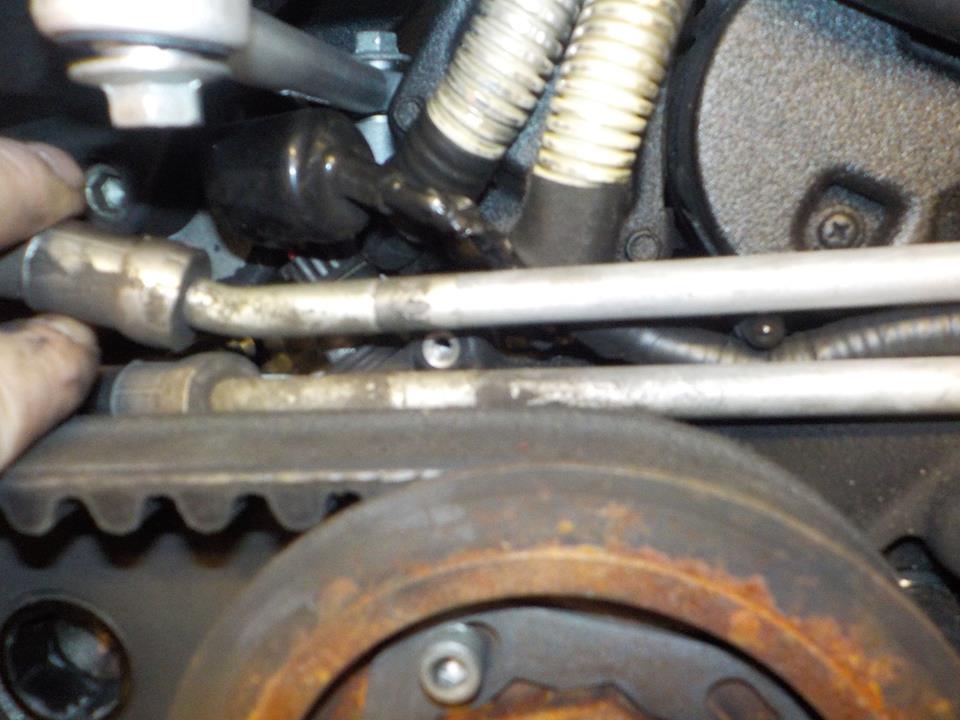
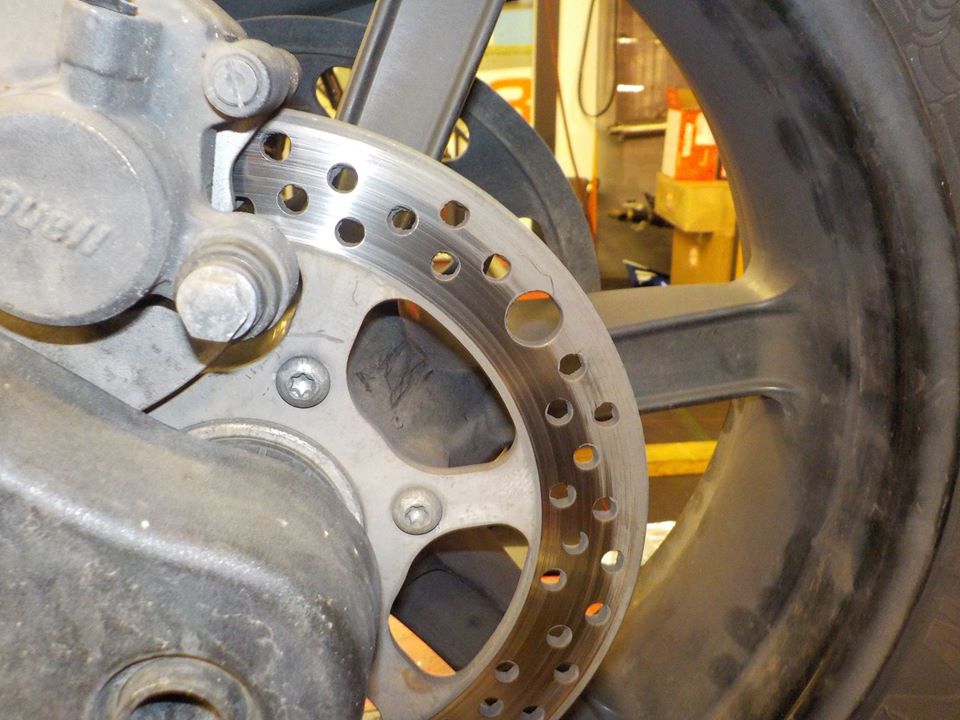
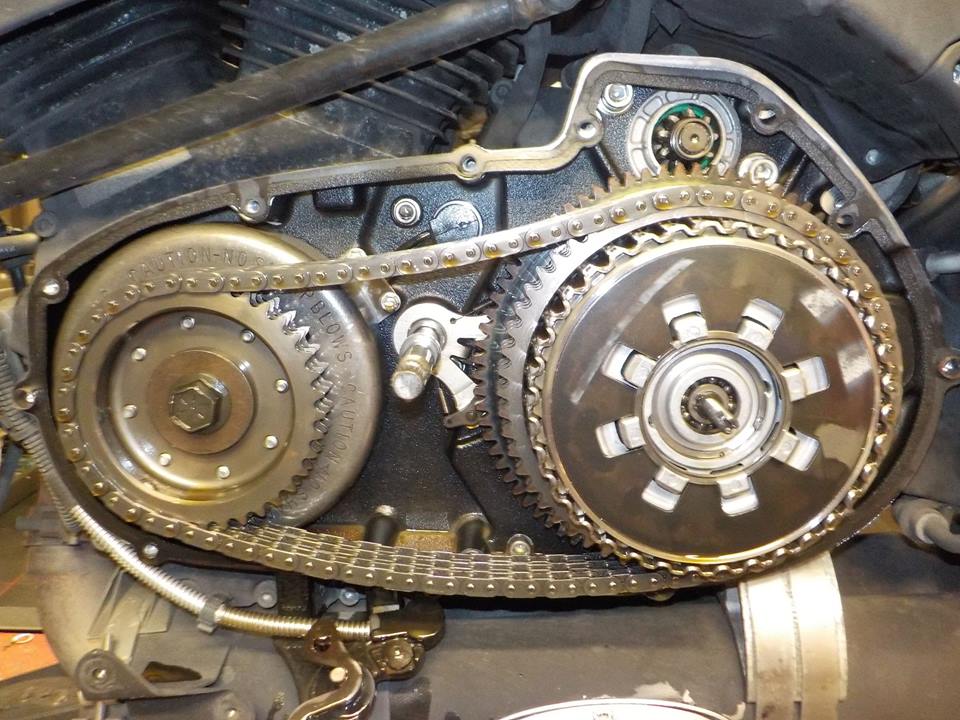
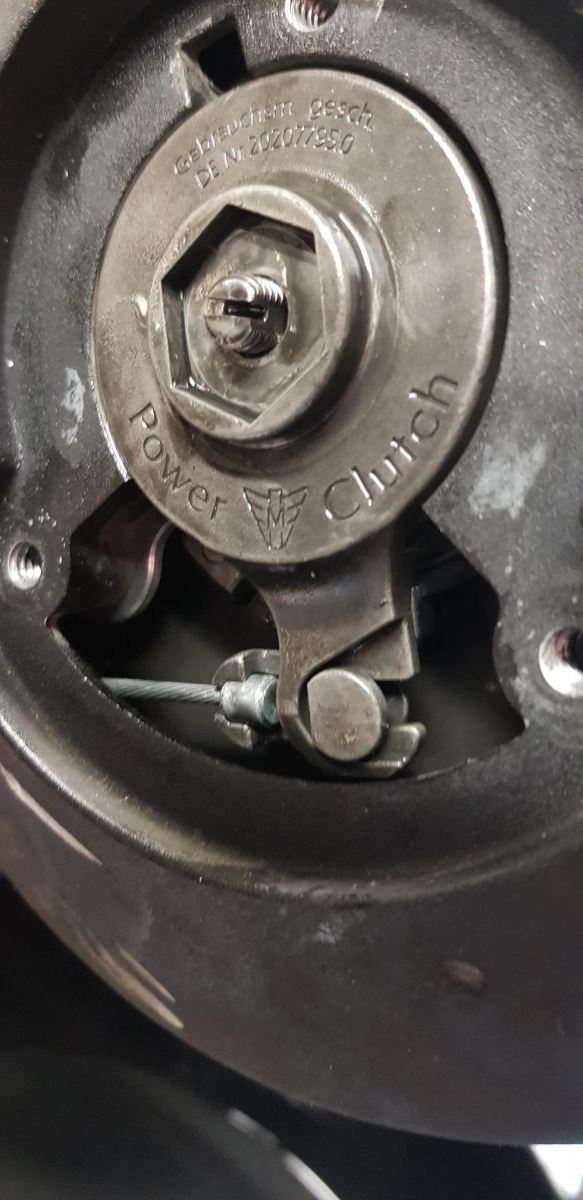
pully cover of , we also need to check the belt tensioner — at Twin Motorcycles Buell Support forever.

spring is corroded , i will clean and lube it and put a new spring on — at Twin Motorcycles Buell Support forever.

unlucky… normaly first carefully try to tighten a little before losening… no way . this one broke — at Twin Motorcycles Buell Support forever.

the other one did work..lots of loose , tighten with penitrating oil , will replace the nuts anyway — atTwin Motorcycles Buell Support forever.

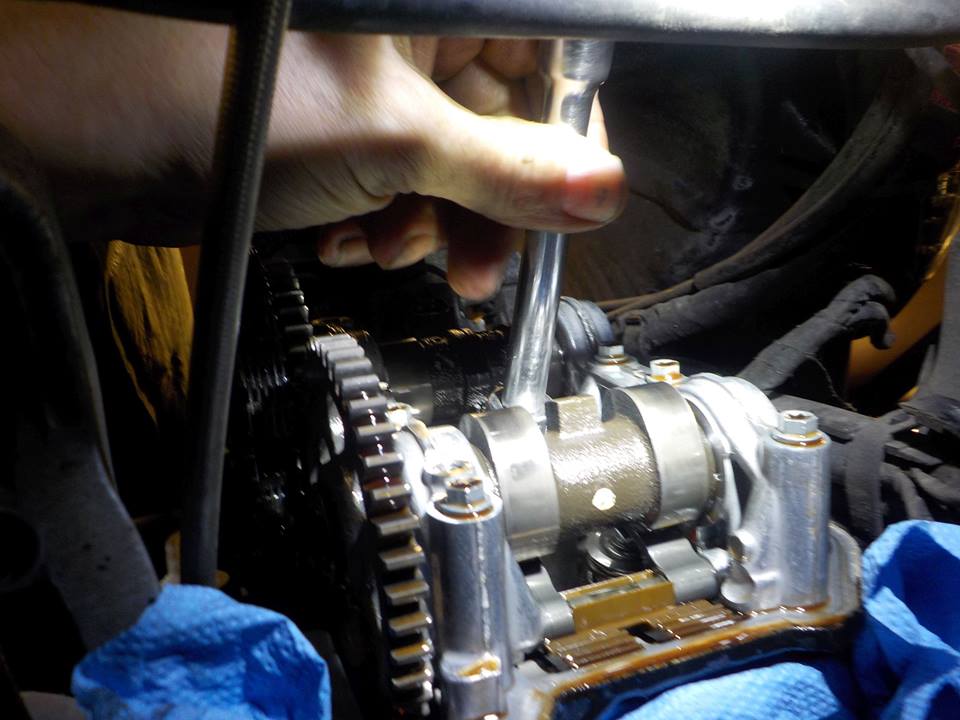
engine rotated down to loosen the rear bolts and take the header of — at Twin Motorcycles Buell Support forever.

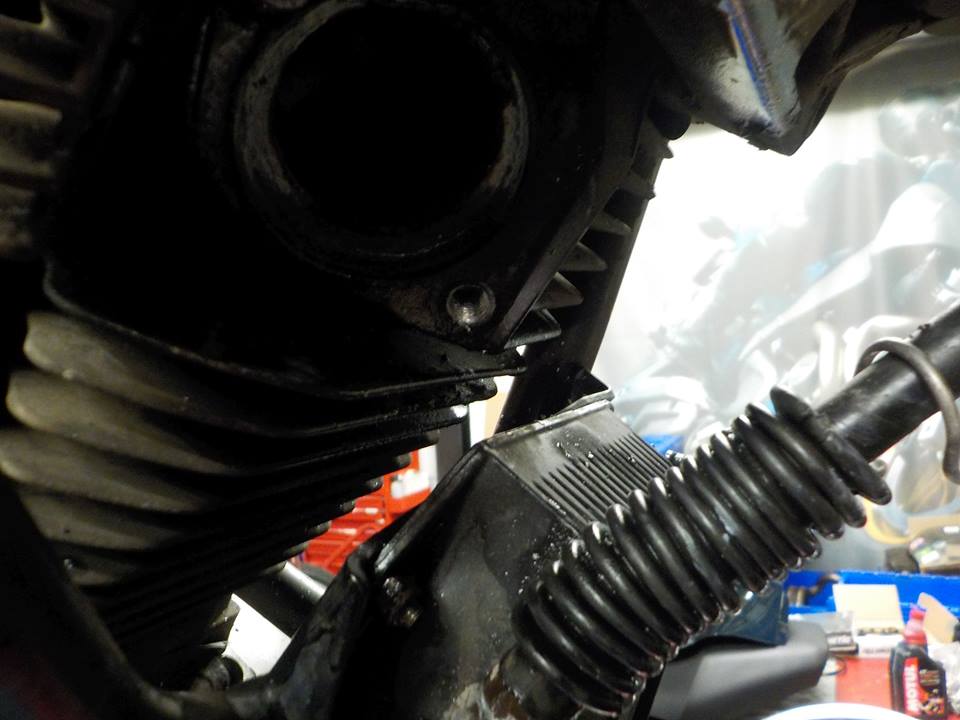
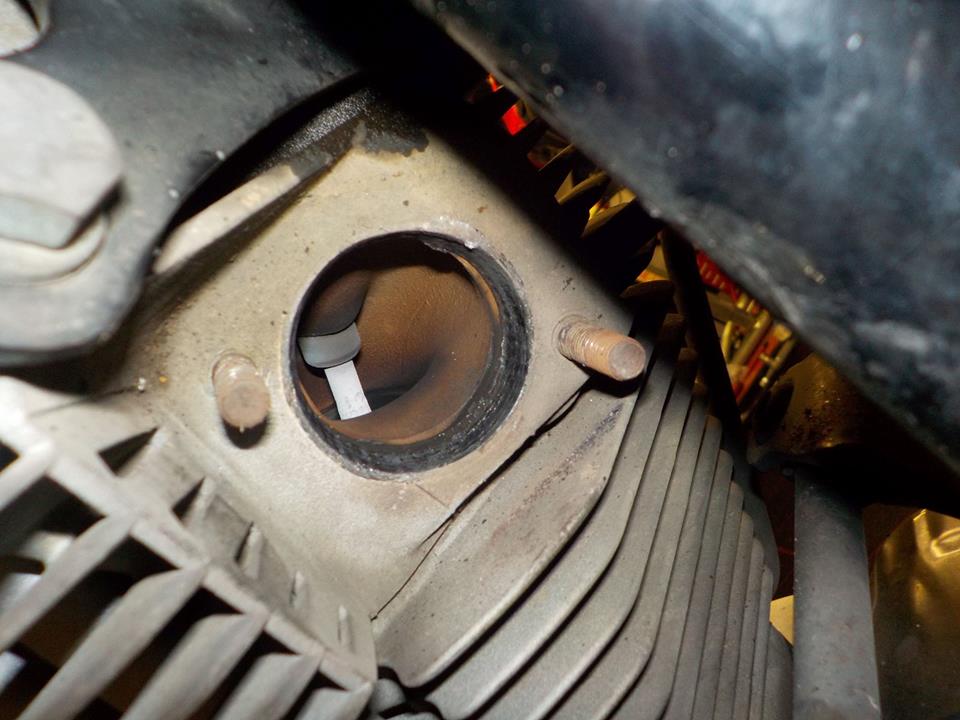
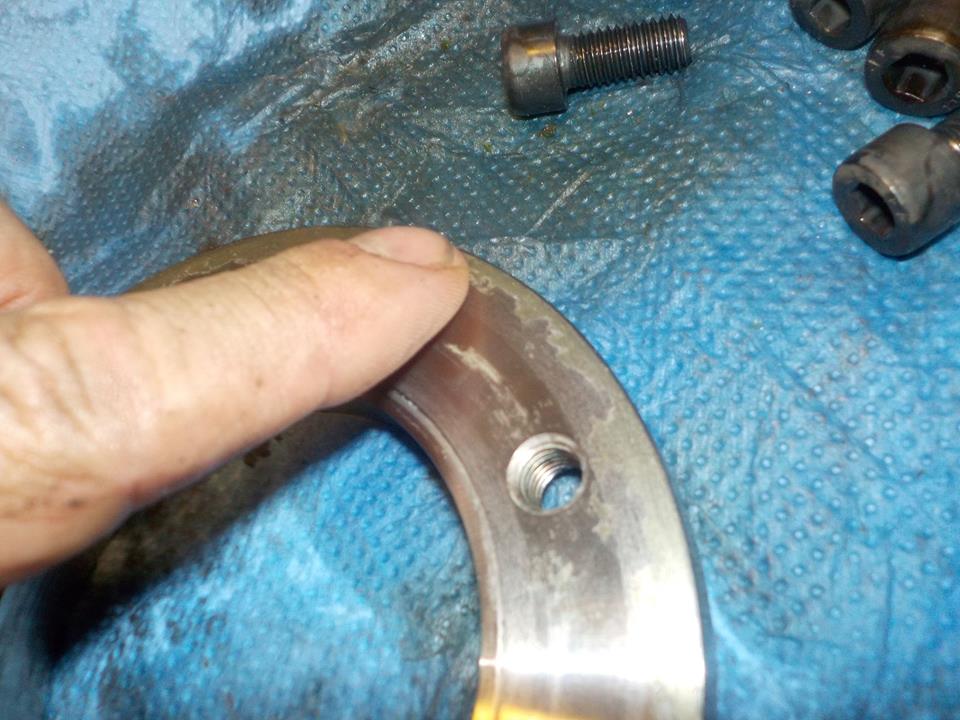
the retaining ring is gone , corroded and fell out i think .. that is the only thing that keeps the headers to the heads — at Twin Motorcycles Buell Support forever.

header has been rattleing inside the flange — at Twin Motorcycles Buell Support forever.

clutch cable bracket out the way to drill the stud out .. will replace this screw. this one is for the trash can— bij Twin Motorcycles Buell Support forever.

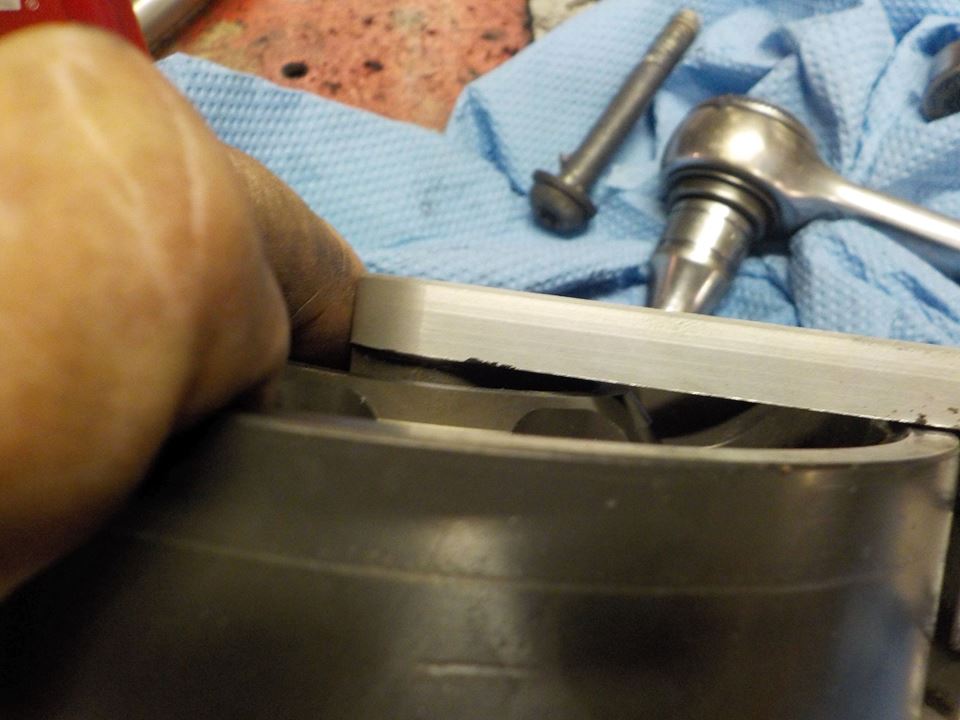
my trusted drill plate… has seen many broken studs— bij Twin Motorcycles Buell Support forever.

and still works.. secret is also to use a cobalt or carbide drill bit.. dril care full as if you break a carbide dril bit .. need to be to the edm shop to get it out ( head removal ) — bij Twin Motorcycles Buell Support forever.

hole drilled , now retap it — bij Twin Motorcycles Buell Support forever.

check… — bij Twin Motorcycles Buell Support forever.

check… — bij Twin Motorcycles Buell Support forever.

new nuts on the stud , i use loctite to mount the studs.. and screw the stud in same lenght as the other one

replacing the rear retaining rings to

you see , also not the best anymore

header on , new nuts

looking good , time to rotate the engine up again

front bolt to 66 NM

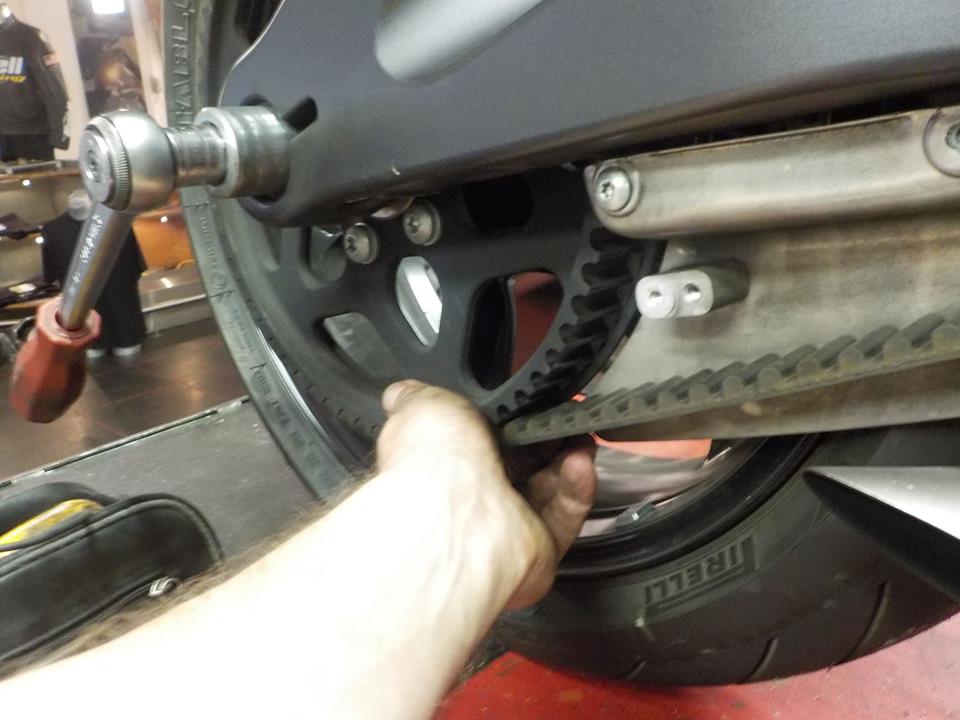
loosening the rearr axle and belt of

belt of the front pully

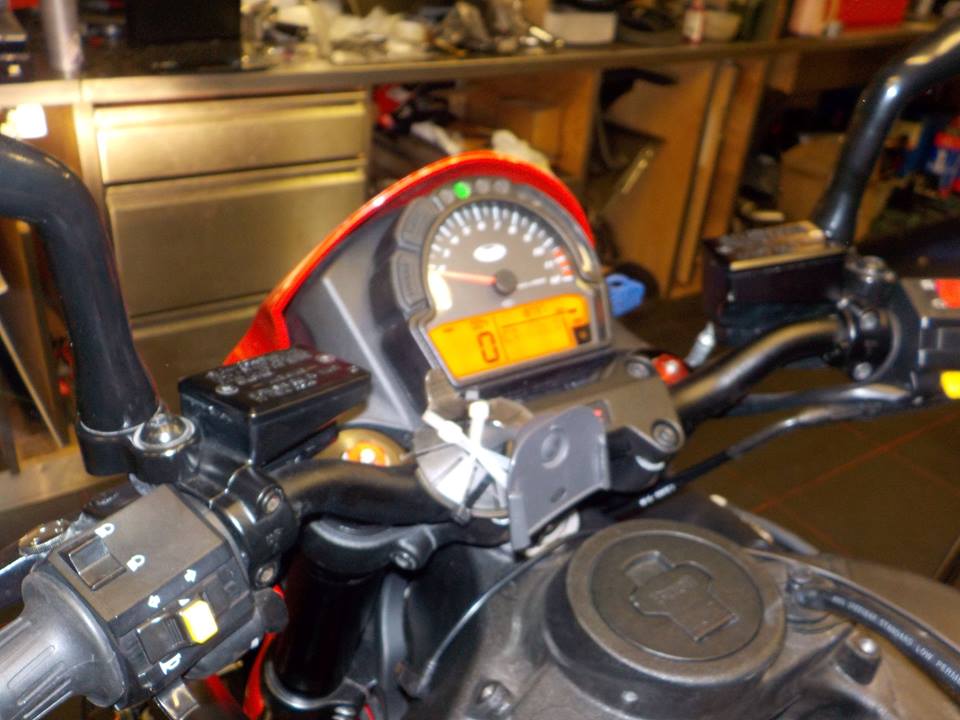
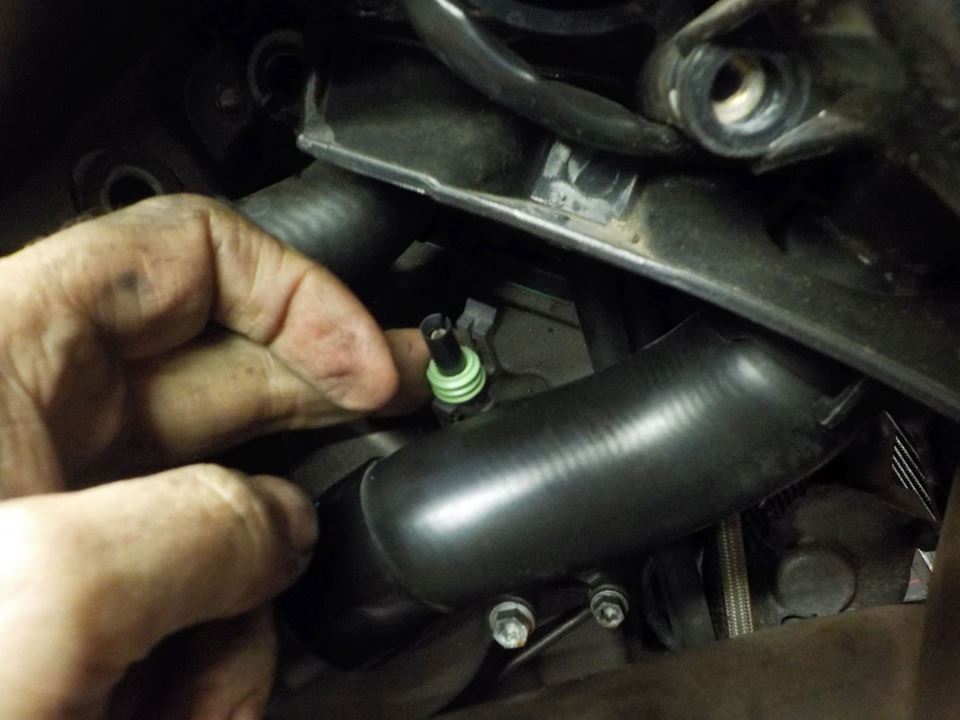
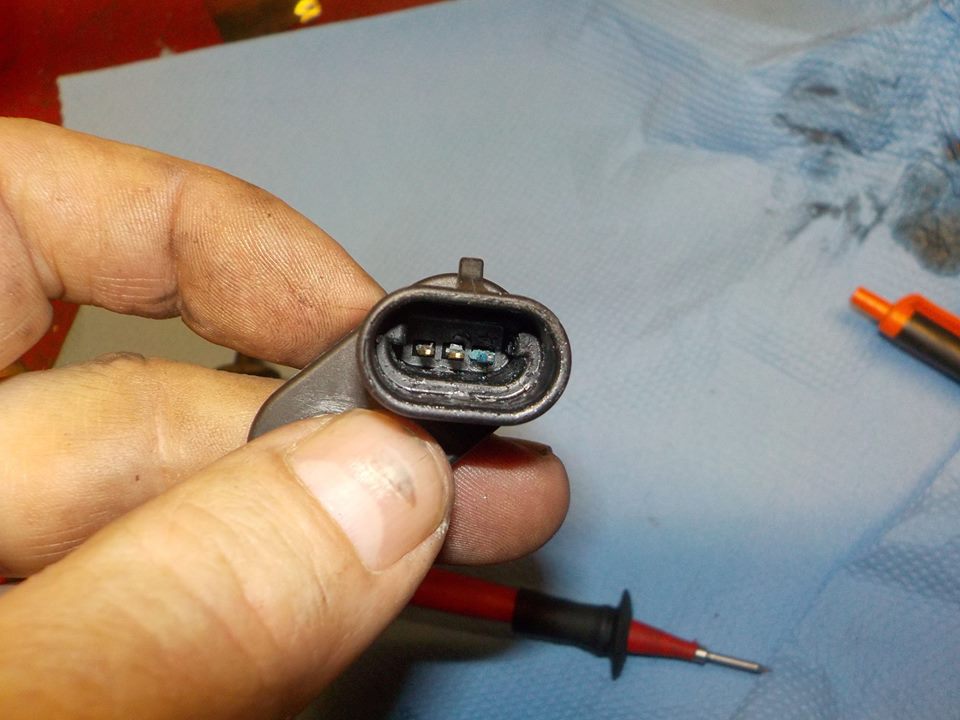
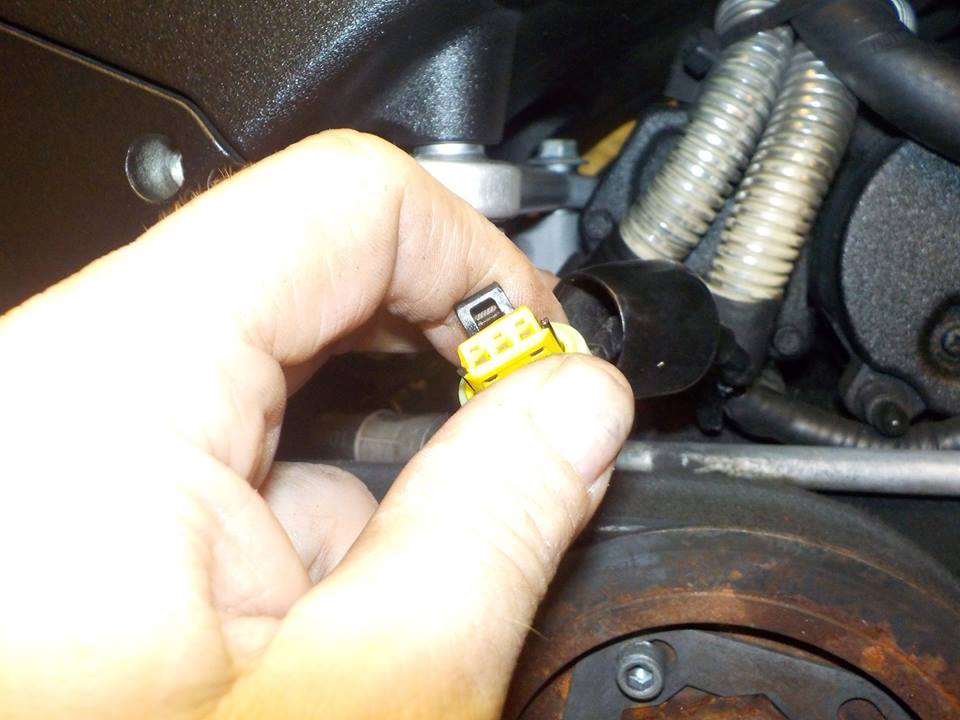
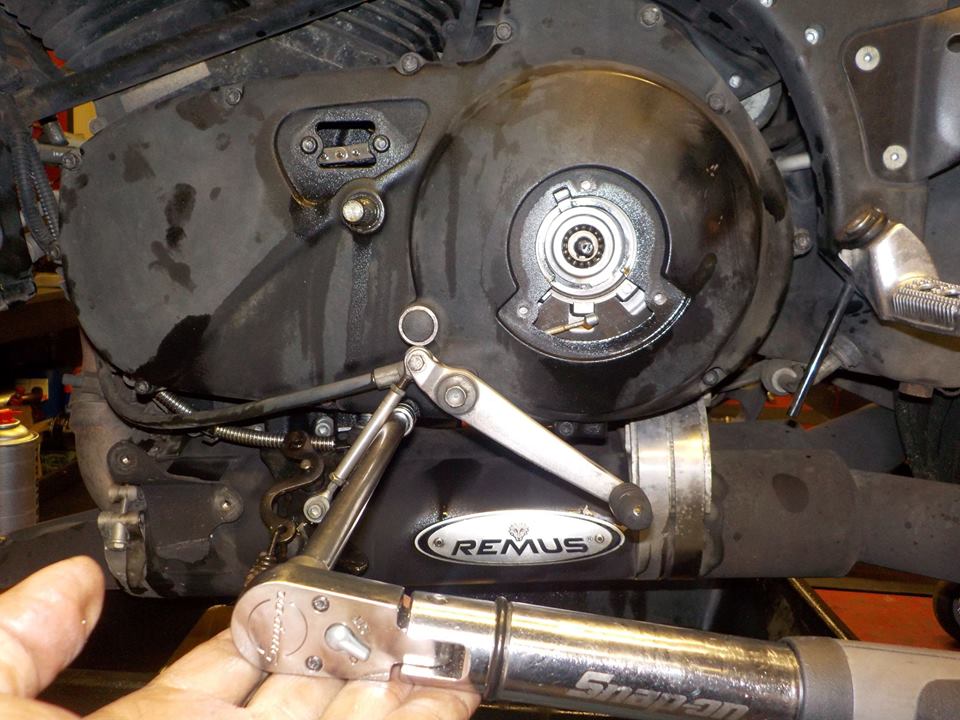
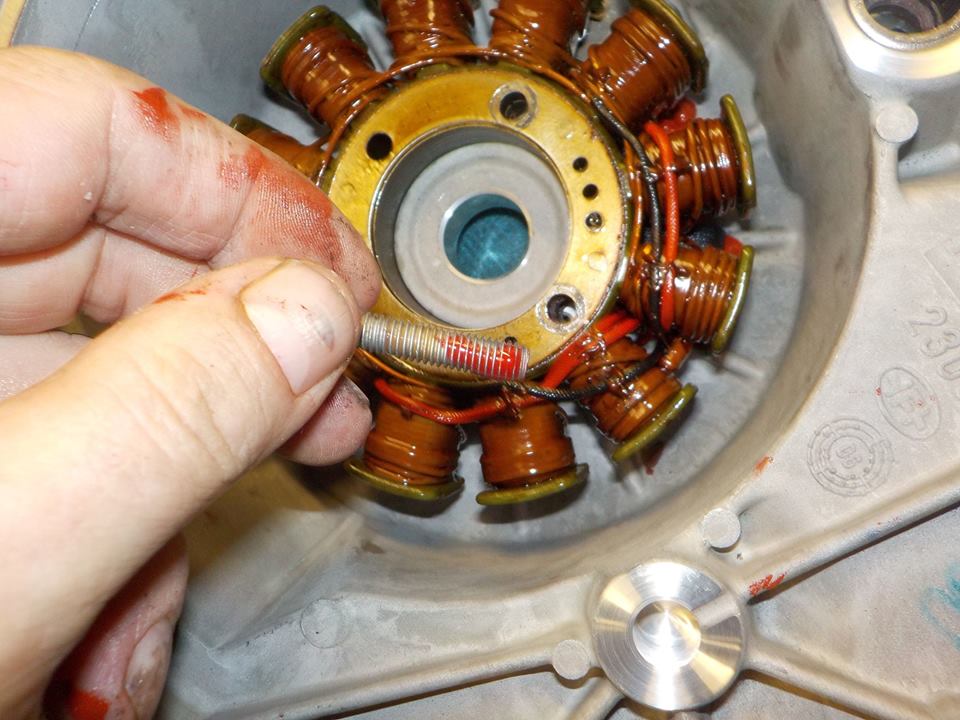
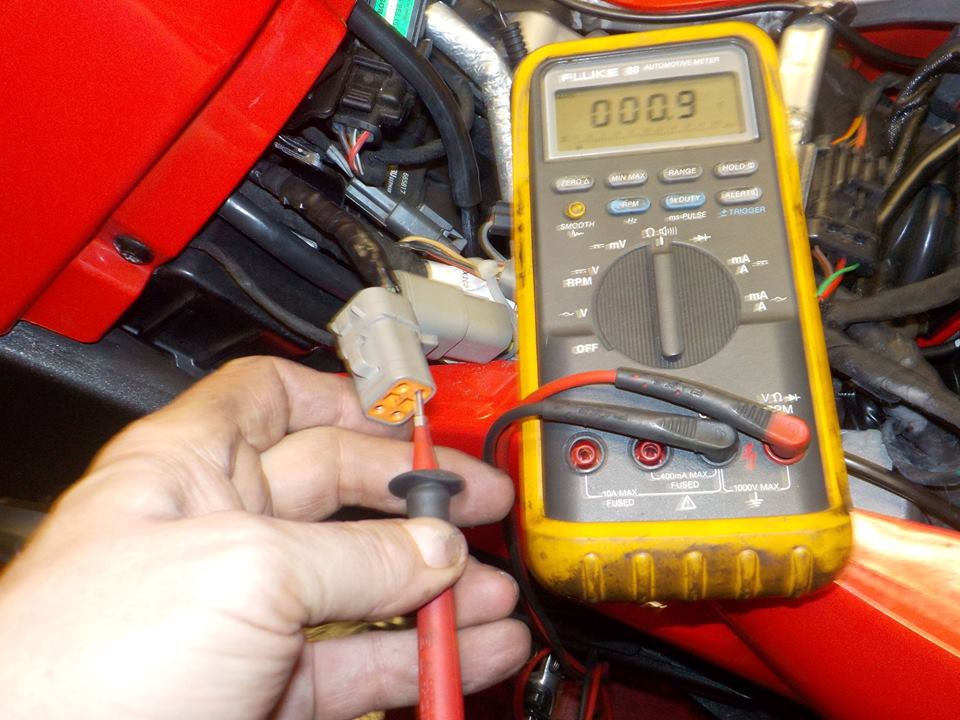
and double check on the neutral sensor.. yes to much resitance ( very common problem )

so old one out

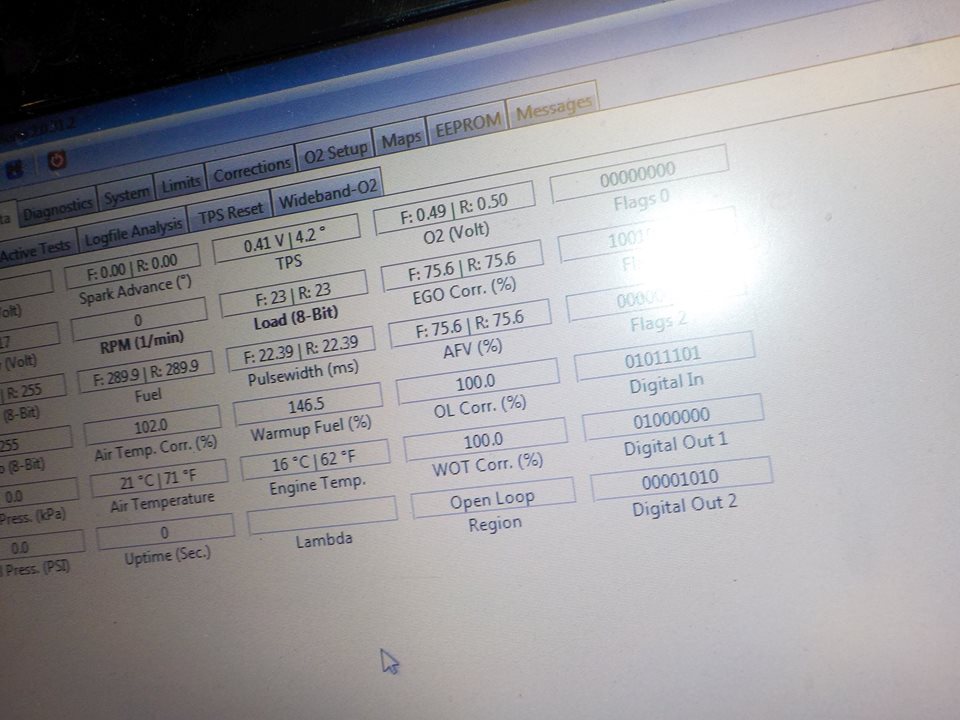
new one in and testing …

taking apart the tensioner

little cleaning can not hurt

pivot has some markings

cleaned and lubed

assembly

and tighten the pivot with the counter sunk screw

spacer the idler out

and mounting the rest.. TQ hammer exhaust back on

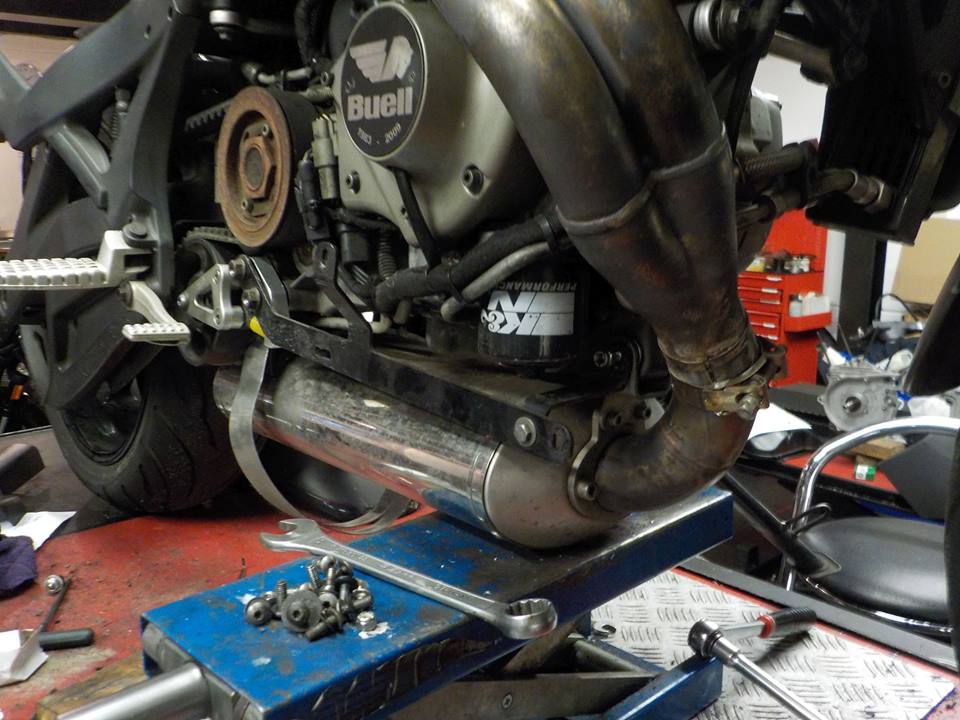
ziping the breather hose so it will not tought the header

scoops back on

and moutning the top tie rod

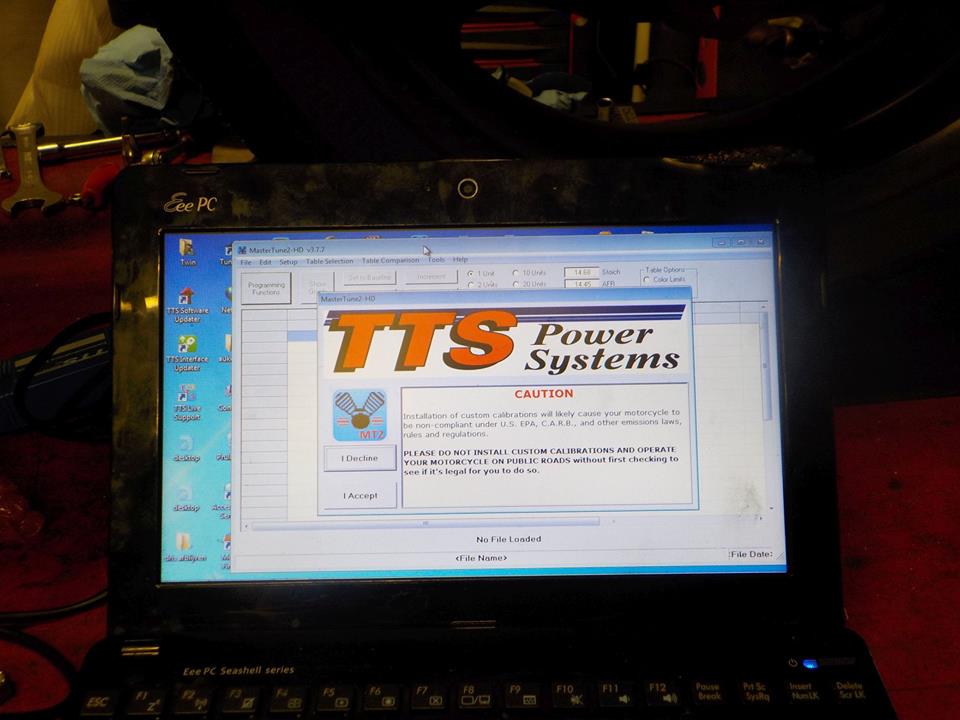
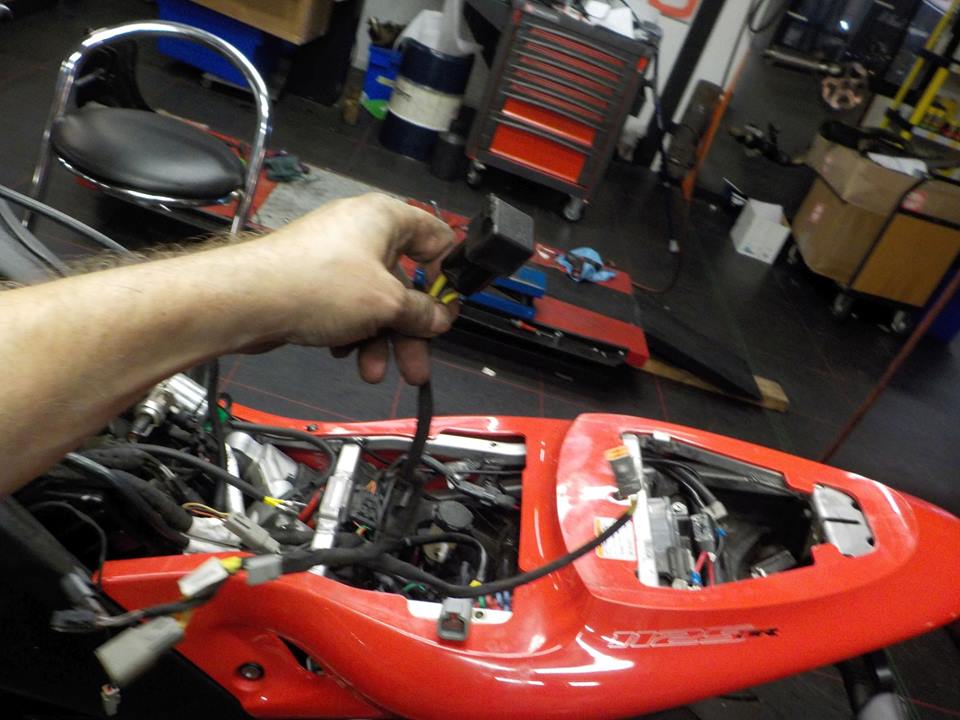
little battery.. much room for ecm to put next to it .. so the seat douse no longer rest on it

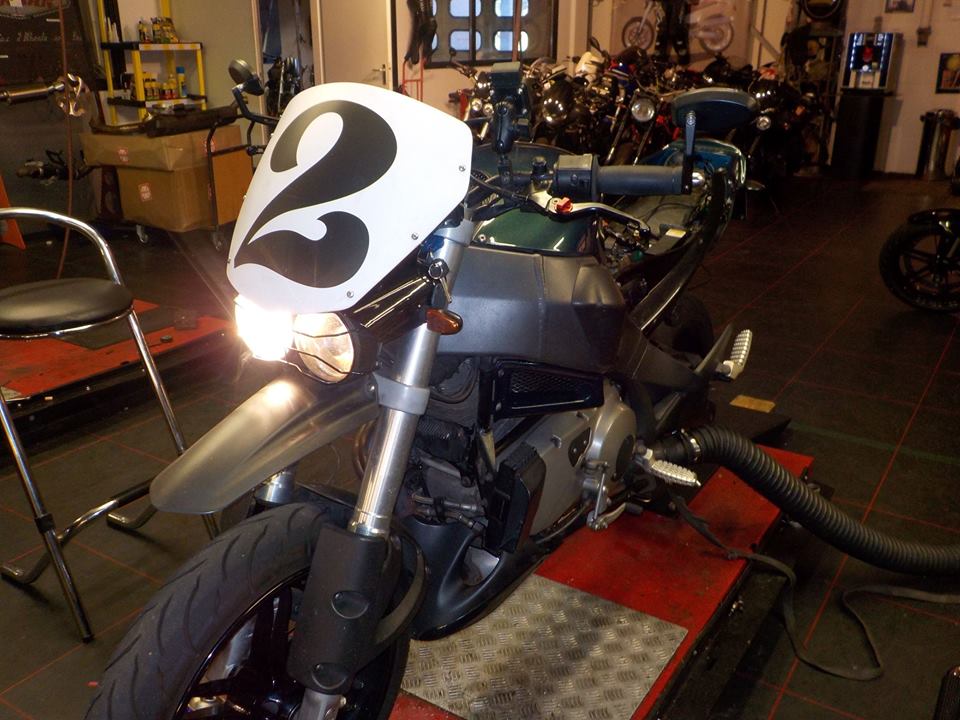
and checking the work… running nice again.. no exhaust fart or rattle

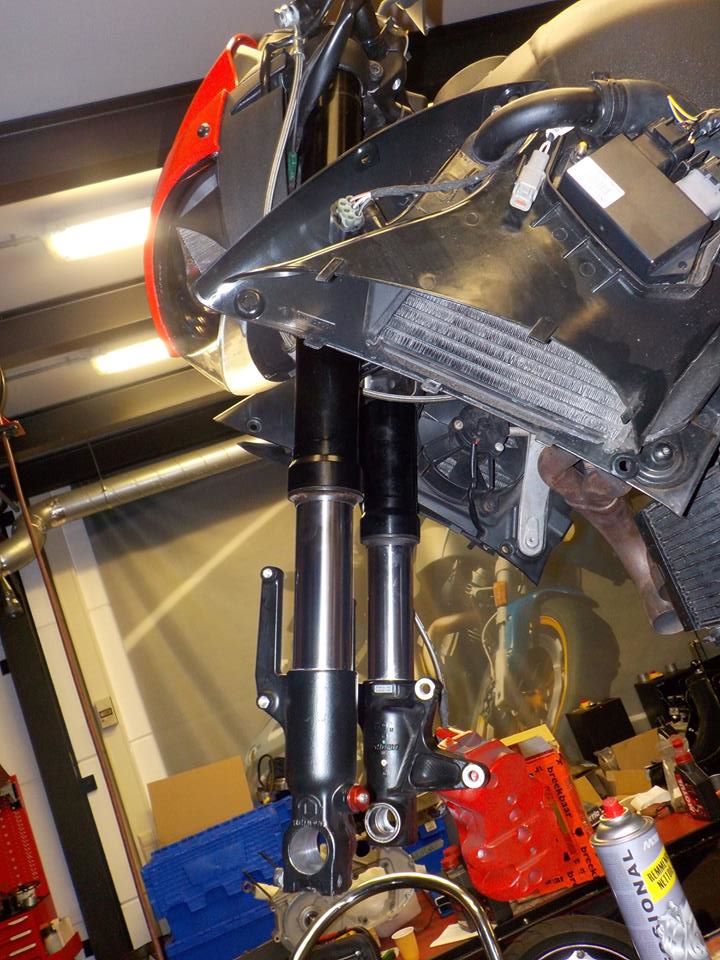
Nice S1 front fork has sprong a leak

right side was done already

left side is leaking now

so axle loose and fork taken out .. protect the top cap nut

pull the top cap of, to get to the locking rings

taking apart is easy , note the spring preload rings

oil seal is hold in with a retainer ring and seating ring.. bought will corrode over the years.. best to replace these

wp fork inners

new seal on…. protect the sharp edges

bushings and spacer rings back on

seal knocked in and new retainers mounted

filled with oil and bleeded the demper ( left side is rebound only, right side is compression only ) and mounting the lock rings

fork in.. axle in.. drop of blue loctite and tighten the front nut

mounting the front fender screws.. use a light loctite

https://www.twinmotorcycles.nl/artikelen.asp?cid=20&aid=2259

Our new Black Torque Hammers are in and stock for all Buell XB9 and XB12 models 2003-2010 AND lowered in Price.


What did we do today: Buell 1125 service finish, XR1200 Torque Hammer exhaust Buell Xb indicators

rear plug looks cleaner thean the front

slow progres on 1 leg. hopping around. but we are getting there.. rear plugs replaced and valve lash checked.. ok untill next service

cover plug back in the ignition cover

with the engine rotated down.. easier to route the cables up

pulling wire inside and feeding up

engine rotated up .. engine bolt in , not tight yet
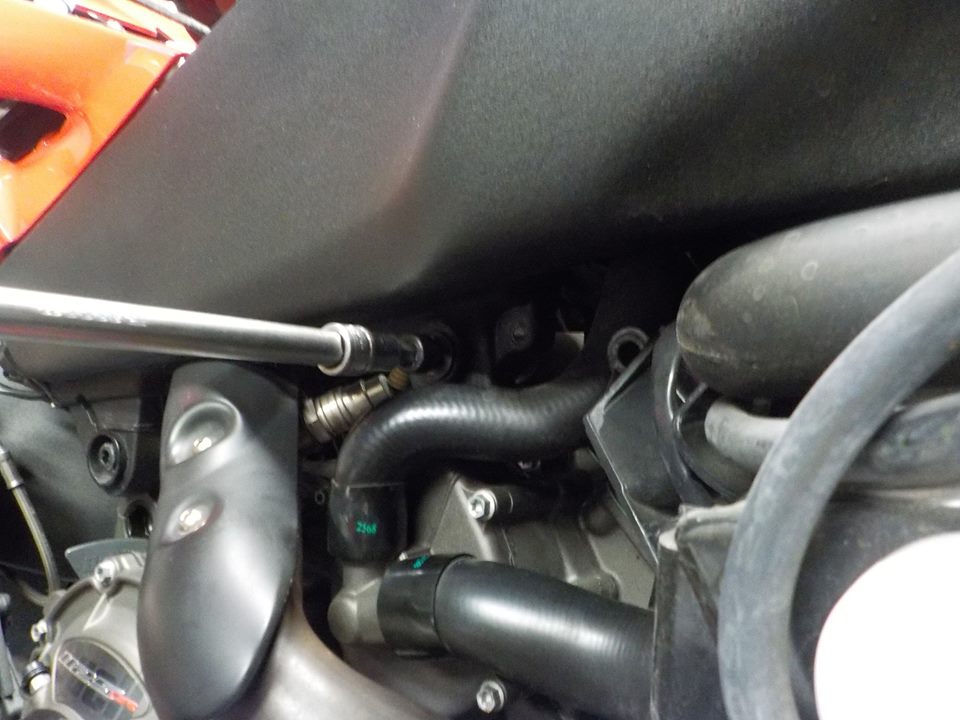
front brace bolts is

and fixed frame side.. these bolts tighten first

and work your way around the engine

foot peg bracket rear back on

rear O2 sensor wire pulled carefully out again

but first .. the Sportzilla..XR1200 special… needs a new exhaust

stainless hard ware used —

next time put a little lube on theme.. stainless on stainless is notorieus for seazing .. needed to break the bolt

front pipe bracket loose

and fron o2 sensor out

a little jiggle was needed to free the pipes.. the front retaining ring is due for replacement , as i could pull the pipe out with the flange on

lower bracket removed

little cleaning on the cam cover behind the 2 very thick pipes

stock conical gaskets.. the TQ hammer , and many other exhaust work better with flat exhaust gaskets . if your not shure what gaskets to use .. ask !

retaining rings.. bend to convex .. new ones will work better

flat gaskets in

pipe and new retaining ring

1 down..

2 down

mid bracket on

and collector pipe on wiggle to make tension free

exhaust bracket on the muffler

pipe and springs on.. tap with rubber hammer on the pipe connections.. to make tension free and line out perfect .. with out tension.. as this is a weak point ( engine moves and muffler is not moving fix to frame )

front O2 back in

now a little cleaning before startup , so my greasy finger prints do not burn in to the pipes

update the engine sw

and let here make some noise

she is running sweet.. and still looking good with 60000 km done now… 🙂

last job to finish indicators mounting

make it nice with some heat shrink tube

and front ones on as well .. she is looking sharp again

1125… engine up and the pods can be mounted back on

left side in place —

air intake scoop in place and cables ziptied and take care off

forks , cleaned and fresh oil

bought legs in

front wheel back in

and tighten the caliper bolts . use loctite on these bolts

exhaust back on

looking nice…

hd wire harnes patch.. mod.. please if you have mounted a burned stator kit… remove this.. as this wire harnes makes the bike charge very bad below 5000 rpm

ut… perfect for spare thick wire 😉

making noise… she is running

and charging 🙂

so last things back on . airbox base and cover

reset the service counter —

and she is ready for pick up


What did we do today 13-9-2018: Buell 1125CR big check up , valve lash and spark plugs and charging fix

On with 1125 pod covers off

ignition gasket on

little bead of sealer on the rubber gater

hold the neutral switch wire out the way

and start mounting the bolts .. place the ones with crush ring back on the designated place —

remove the old silicone used from the bolts

ignition timing sensor in and leave the stator cable for now as we going to drop the engine

side pod loose

and leave it hanging

exhaust loose

and remove

right side pod loose

just checking.. never been done on this bike i think

some crud , as everything runs in the same oil , normal to find a little

pulling out the strainer and cleaning it

strainer back inn and cove back on

on with the service.. rear wheel check.. pich bolt loose size 10 mm —

rear caliper loose using the big holes in the disk ( made for this )

belt is ok

rear bearings nog… feeling crunshy

new bearings in

and setting axle to tq counter clock wise

bike turned around and airbox cover of

always take care pulling of the lower airbox..as these bikes are dirt suckers and allot is left lying loose in the airbox

so intake some protection against the dirt , and pull the airbox of

to have better acces to the rear valve cover remove the solinoid with bracket and al

smart to take the power off

and moving in from the front. caliper and wheel out

front bearings are ok

caliper on holding position

fork legs out

center engine bolt loose and out

disconnect the rear O2 sensor

and take the front brace bolts out

intake duct out

and loosen the cables left brace , cut the zipties and pull the tabs on the horn

loosen the clutch master to give the line more lenght , put some protection over it

ignition cover remove the plug

to get to the crank drive ( 16 mm hex )

a little light so i can see what i’m doing

giving the rear O2 sensor wire more room

if more needed , cut the loom open.. normaly it will do

stick coil out

and cover of .. use a napkin under the head.. for oil spill in the header

spark plug out

not bad. but still customer will notice there are new ones in 🙂

valve lash is still with in specs.. will need adjustment in the next big service , cams look very good —

checking the cap on these to

plug in and stick coil in .. make sure the coil connector locks .. other wise secure it with a small ziptie , to morrow finish

https://www.twinmotorcycles.nl/artikelen.asp?cid=20&aid=2257

Buell XB 9/12 LED Head light Black and Chrome model with TUV new Suitable for all Buell XB-S and X models.

Buell XB 9/12 LED Head light Black and Chrome model with TUV new
Suitable for all Buell XB-S and X models.

Black: https://www.twinmotorcycles.nl/webshop/artikel.asp?mc=1&aid=14915&cid=0&s=01black&a=
Chrome: https://www.twinmotorcycles.nl/webshop/artikel.asp?mc=1&aid=14916&cid=0&s=01chrome&a=


What did we do today: 12-9-2018 making a Buell XB12X run nice again.

we alerady made a diagnoce on this Uly leaking seals and old firmware

so engine rotation .. exhaust valve really no use .. i will remove it as weight is HP

airbox cover of and loosen the top engine ty bar

wire harness guide loose , so no tension on the cables when the engine drops down

coil removes to get to the throttle cables.. i see a little damage looks ok

cables and fuel hose loose

clutch cable adjuster loose to unhook the cable from the handle bar

left side , side stand and crank pos sensor wires loose and disconencted

engine supported and mounting bolt loose

wil clean the corrosion of and lube it

engine rotated down.. and intake flange bolts loose

while we are here .. spark plug looks like they have been a long way in

meehh some new ones will make it better

intake manifold off

old seals in the 08 -up ( XL 07- up ) long flanges , rubber is hard

some cleaning and ne rubbers on

the easy way to do plugs.. with the engine down

manifold in place and injector wires on

engine rotated up and front bolt in

clutch cable adjuster lubed for longer lasting fun.. so it will not corrode seazed for the next service

engine in place.. change the belt

pich bolt loose and rear axle loose

footpeg side plate needs to come of

belt is at the end of it’s life

really hard to tell how long

rear brake pads where about worn out

rear brake pads where about worn out

new one sin

checking wheel bearings.. ok these are toast

mounted in the wheel could not turn theme over, loose .. tuning you feel the crud in the races.. these are done for

pully is getting worn out.

new belt on and swingarm brace on

tighten the rear axle and the pinch bolt

connecting the left side connectors

right side scoop on… hard to fit these

wires to the throttle bodie and fuel line on

top engine tyrod

throttle cables on

not first the handle bar grip so we can check we can adjust the throttle cable ok

coil back on

and intake stack on.. confirm it is on fully

airbox cover on

taking out the needless cables

relocating the ecm .. firm ware upgrade and fuel mapping

ecm on it’s new spot

you see where the seat has been pressing down on the ecm connectors

just checking with some fimo the ecm clears the seat now 🙂 better like this , can give very strange errors and riding badly , this lady is ready to go home

https://www.twinmotorcycles.nl/artikelen.asp?cid=20&aid=2256

8-9-2019 Buell XB9SX 2009, speed sensor trouble, Buell XB12SX clutch issue, Buell XB neutral switch, Buell 1125CR start repair charging system


early morning arrival still very nice and well kept bike , but the speedo and fan stop working when warm ( Fan works on speed signal in the lastest Buell ecm firmware ) 

AMC error ? funny.. Xb9 has no exhaust valve.. seen this more speed sensor trouble

speed sensor same place as all but on the 2008 -up more difficult to get to

best to loosen the oil ine holder

and pull the breather out the fitting

mnnn stone chip just caught my eye .. these thing will scar the idler pully or break the belt

the connector is very hard to loosen with the sensor in place as the lock tab is at the rear

out and connector loose

55000 km will show some metal dust on the sensor ( infact a magnet )

could be terminal issue ? need to try

give it a clean

and clean the connector , and some di-electric grease

sensor back in and oil line back on

brace mounted again

hope this fixes it , other wise the sensor needs replacement

XB12 2010 daily rider.. clutch issues , clutch douse not come free.. and feels funny

checked the adjustments

little play on the lever

ziptie on the boot , as the gearbox was some watter noticeble

checking clutch adjustment ( rear wheel in the air, pulling the clutch ) and turning the wheel , funny noise not good primairy is also way to tight 1 point

rear disk is also bent

al in all for me enough reason to take the primairy of and have a look , oil still looks like choco milk

primairy tensioner loose

and cover of

normaly after removing the main shaft nut.. you should be able to pull out the clutch hub .. not so in this case

so take the clutch plates out ,clutch tool mounted

plates out, and i could pull the hub out… the basket bearing is completely destroyed

no problem.. new bearing in.. and long lasting thick sticky oil to help in lubrication

hub back on

plates in 1 by 1

important to check behind the clutch spring .. as it collects debris here.. and this will prevent the clutch to come free if the build up is to much

pressure plate on.. spring seat ring on and with your finger you can push the retention ring in

red loctite on the mainshaft —

conical ring positioned correct and fasten clock wise !!

pulling plate on.. retaining ring douse not seat right .. these get bent out off shape and can cause it to pull out

new ring seats perfect , and snappy

cover back on.. ans tq down the bolts

loctite on the shifter bolt !!

oil in and mechnisme in

chin spoiler on and testing.. runs much smoother en more silient now

neutral switch not working.. pulling the cluch lever wil make the engine start , so you don’t have to push start it 

losen the axle pich bolt

and loosen the axle 15 turns to have the belt tension of

take the belt of the pulley

testing old switch , open circuit

belt of the front pully, thin 5/8 socket little under angle and you can get it out

check the crush washer comes with it

new sensor in.. nice 0.7 Ohm

belt turnes on

and tighened the axle .. ready to go —

1125 no charge.. also needs service so running warm and drain the oil . left plug out

and right plug out

plugs back in and new oil filter in

for the cover to come of , cooler line needs to come loose , removeing the clip and pull out the oil line —

take the connector apart top side

and cover of .. stator is nice and chrispy… looks like a rewind job ? please before you do this .. confirm with the rewinder the wire they use is up to specs..and can handle 200 deg. C.

i bet the rotor has not been upgraded , bolts out the sprag adaptor

center nut of and rotor pulled of , no oil jet in the double spline

sprag adaptor.. cleaning the threads of old loctite

same for the bolts

and clean of the hardened spill of locite, this will give a tension on the flat surface, and a way if this layer comes of to loose some tension on the bolts

sprag bearing back in the holder ( outer race )

stator with oiljet mounting

i use 272 for these to ( also for the big nut )

tighen to 35nm and the big one 400 Nm

old stator removal

double crispy

i hate when they do this … silicone pushed of the mating surface .. and forms a edge on the inside waiting to come loose and plug oil channels

new stator , wires bedded.. easy to first mount the wire guide

and that mount the stator .. use 272 red loctite for these to.. seen these come loose to many times .. and let this set for the weekend..

https://www.twinmotorcycles.nl/artikelen.asp?cid=20&aid=1255

6-3-2019 – We can offer a very good repair now for the Broken primairy cover for all Buell XB9 and XB12 models 2003-2010

6-3-2019 – We can offer a very good repair now for the Broken primairy cover for all Buell XB9 and XB12 models 2003-2010

We can offer a very good repair now for the Broken primairy cover for all Buell XB9 and XB12 models 2003-2010

A problem that can happen with the Buell XB 9/12 series Buell is that the primairy cover clutch mechanisme holder can break

while the methode of the DFM plate repair is not new, we are glad we can offer this service in our shop and for our European customer , in kit form or as repair for you to send your bike / cover in

The cutting of the broken bit can be a pain with a angle grinder or dremel  tool, as you want the base to be flat and even.  we made a Jig to mill this with little effort to the right size and flat

drilling the holes through and tapping the threads. The best to start from the front side ( dril and tap included in the parts kit )

Clean and cheking the fitment

the counter sunk screws are included in the kit, use loctite on these , so they will never come loose

thighen ( bit also included in the parts kit )

ready. looking for the front

check the cover on the bike.. with gasket there should be enough clearance between the DFM plate and the Clutch hub finger

mount the cover and clutch mechanism  and adjust to specification

lock plate on and inspection cover on, use the added washers to mount the cover ( the stock bolts have become a little to long )


or cut the original screws a little shorter


link to the part kit DFM001 

link to the Primairy cover repair done by us ( you send in your cover  to us ) DFM002

https://www.twinmotorcycles.nl/artikelen.asp?cid=20&aid=2255

What did we do today: 6-9-2018 Buell 1125 ignition cover replacement, Buell XB12X diagnose troubles, Buell 1125 charging diagnose


mishap cover still needs to be replaced — at Twin Motorcycles Buell Support forever.

oil line clip loose , to pull out the oil line and turn it down — at Twin Motorcycles Buell Support forever.

pully cover of — at Twin Motorcycles Buell Support forever.

neutral and side stand wire holder of — at Twin Motorcycles Buell Support forever.

ignition sensor out — at Twin Motorcycles Buell Support forever.

with the new cover the plug is not included.. so taking this one out — at Twin Motorcycles Buell Support forever.

cover screws loose — at Twin Motorcycles Buell Support forever.

and gently pull the cover of — at Twin Motorcycles Buell Support forever.

screws out for the guard — at Twin Motorcycles Buell Support forever.

carefull pulled the stator of the old cover — at Twin Motorcycles Buell Support forever.

bed the wires and the wire gater with some silicone , screw back on the metal guide first , before you put the stator in place , works easier

clean and put red loctite on these screws… we seen these come loose.. even 1 time is to many !!

fresh gasket and new cover on

plug back on — at Twin Motorcycles Buell Support forever.

clip first on the oil cooler , to push the line in — atTwin Motorcycles Buell Support forever.

plastic plug in, wet the o-ring a little , works better

testing .. and heating up a litte to check the work… she is ready for pick up

2008 Uly in with some issues

need to check of the ecm is cracked ? seat has been resting on the connectors.. will reposition this anyway

ego / afv very low ( leaning out ) . with open exhaust normaly it needs more than 100 AFV

intake seal testing .. yep leaking ( see clip ) afv is dropping even further.. as the brake cleaner makes the mixture richer

need to call the customer.. belt is also getting ready

1125 Cr a other very nice one

brought in by the road service… contact on says theft errror… if the battery is very low it will say this

and the HD wire rubish mod is still in.. ( no tp bad charging below 5000 rpm ) we are going to remove this when we have upgraded the charging system

no start.. but easy stator to ground checking
stator has burned the isolation as it is grounded

on 2 lead

yes full house on al 3 lead shorted to ground.. would be a thing to see how crispy the stator is 🙂

first charge the battery… careful when the plastic protection is removed

https://www.twinmotorcycles.nl/artikelen.asp?cid=20&aid=1254